The other day I played Guitar Hero for the first time in months (yes, I still have mad skills. haha). As I was playing I found it difficult to activate the star power. I know that the newer Guitar Hero brand guitars actually have a button that activates star power where the saddle would be on a real guitar. I only have the cheaper 3rd-party brand guitars and they do not have a button like this. I have to reach down and hit the ‘minus’ button to activate star power which makes it very easy to mess-up and lose my multiplier/streak. As I was playing I realized it couldn’t be too difficult to add my own button, so I opened up the guitar and began working. . .
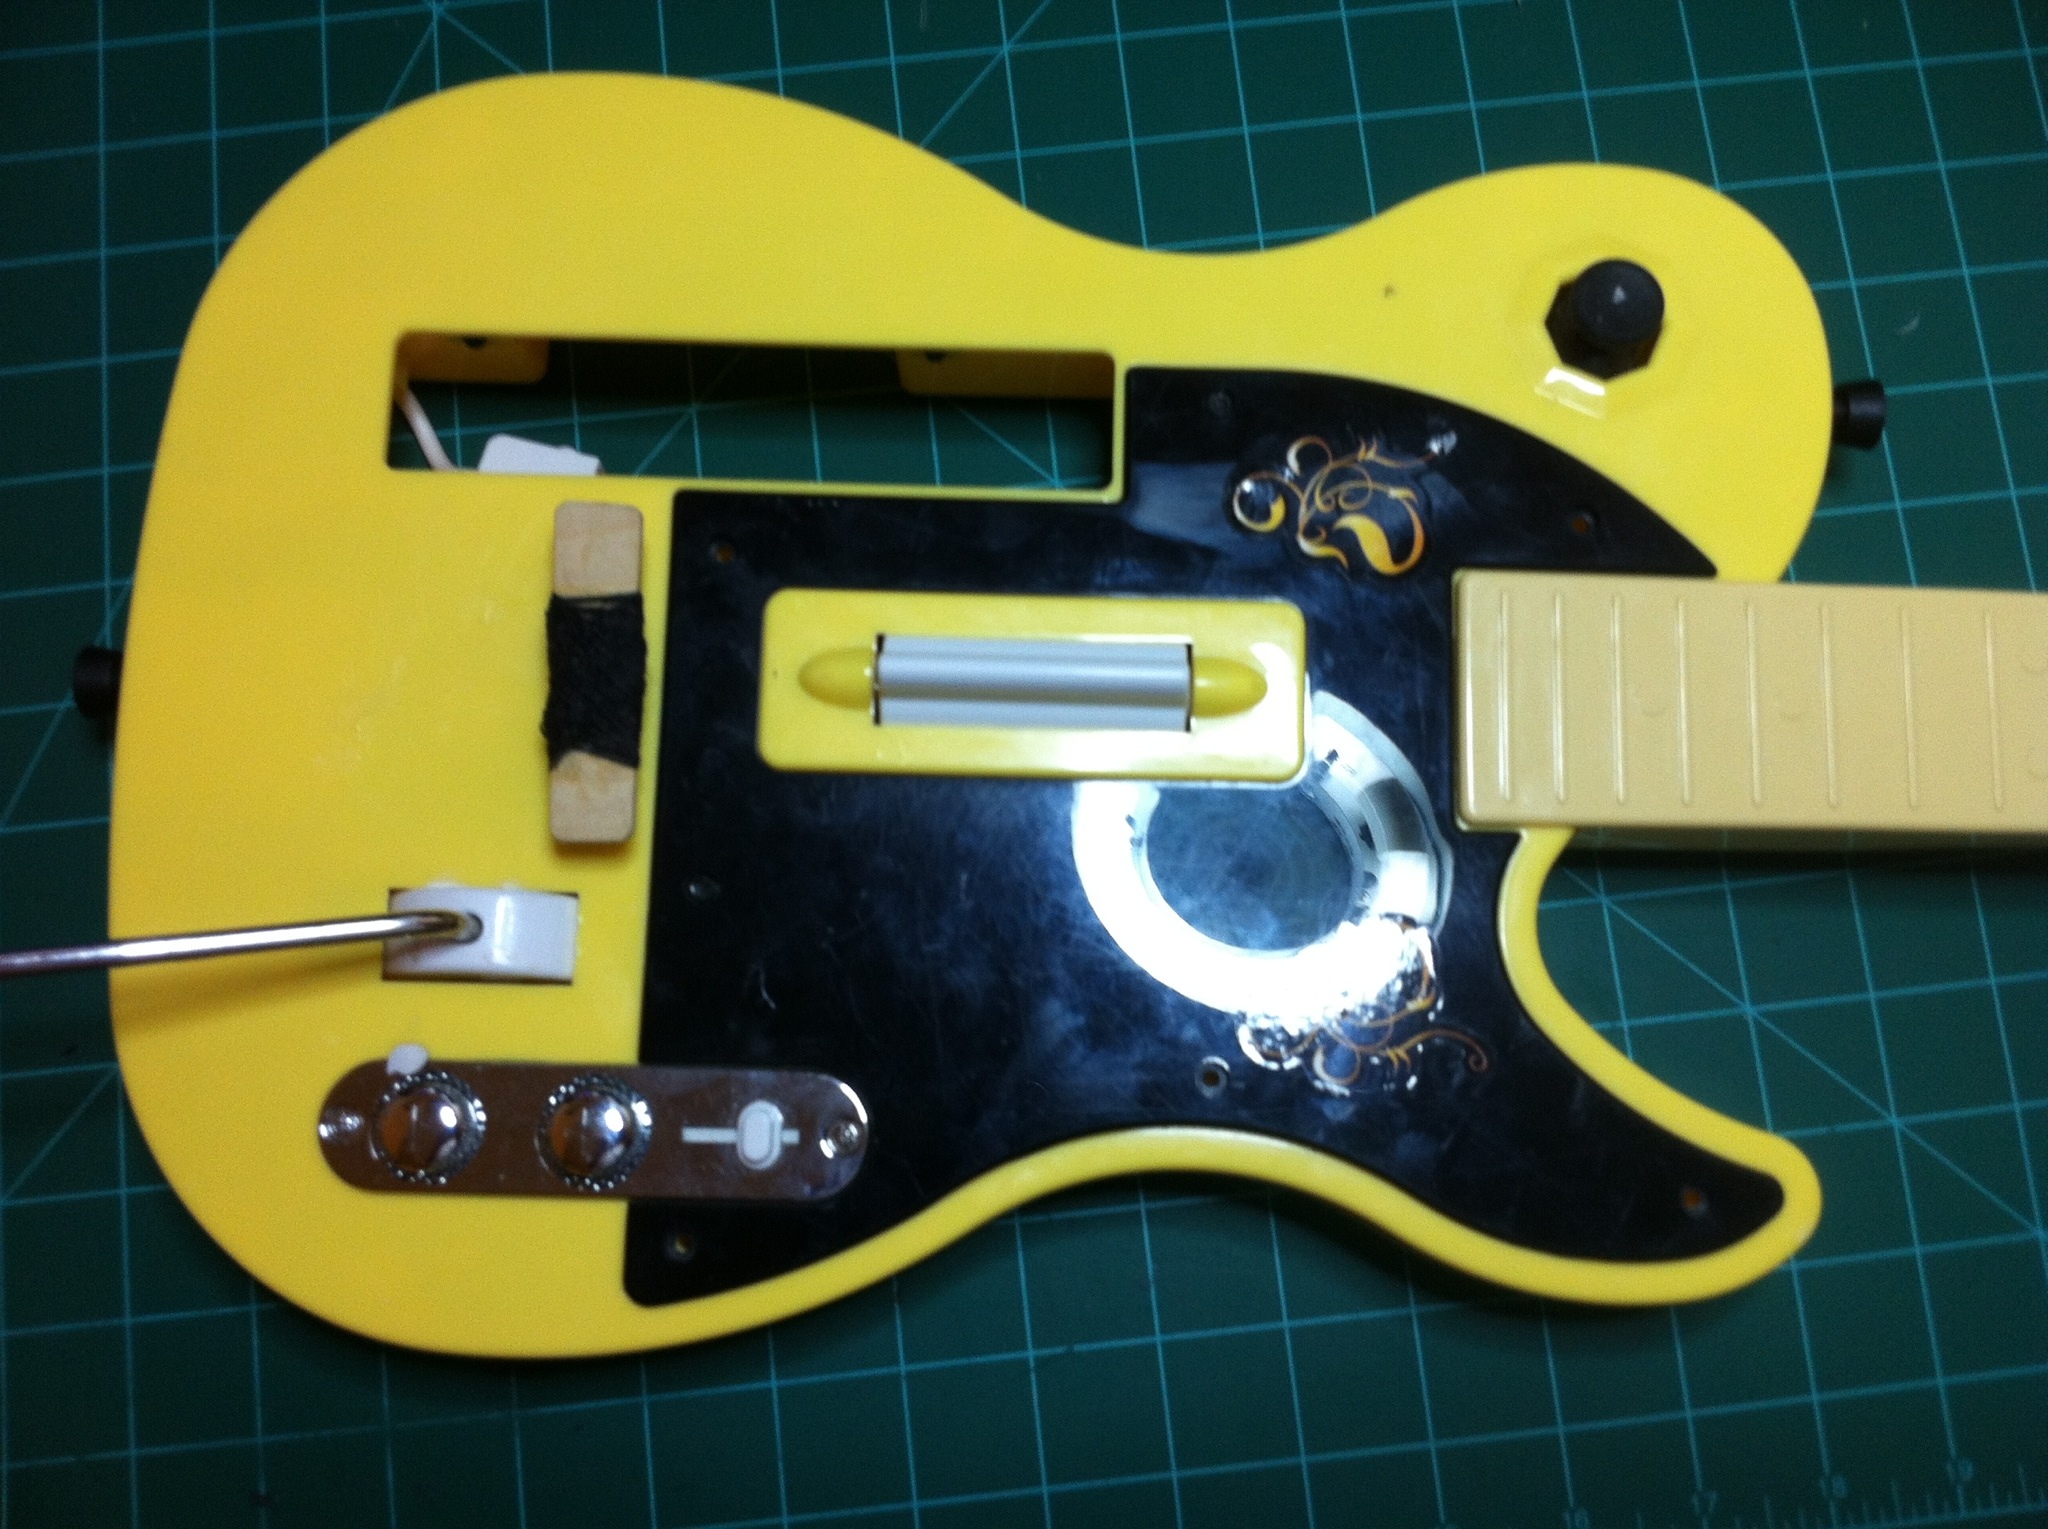
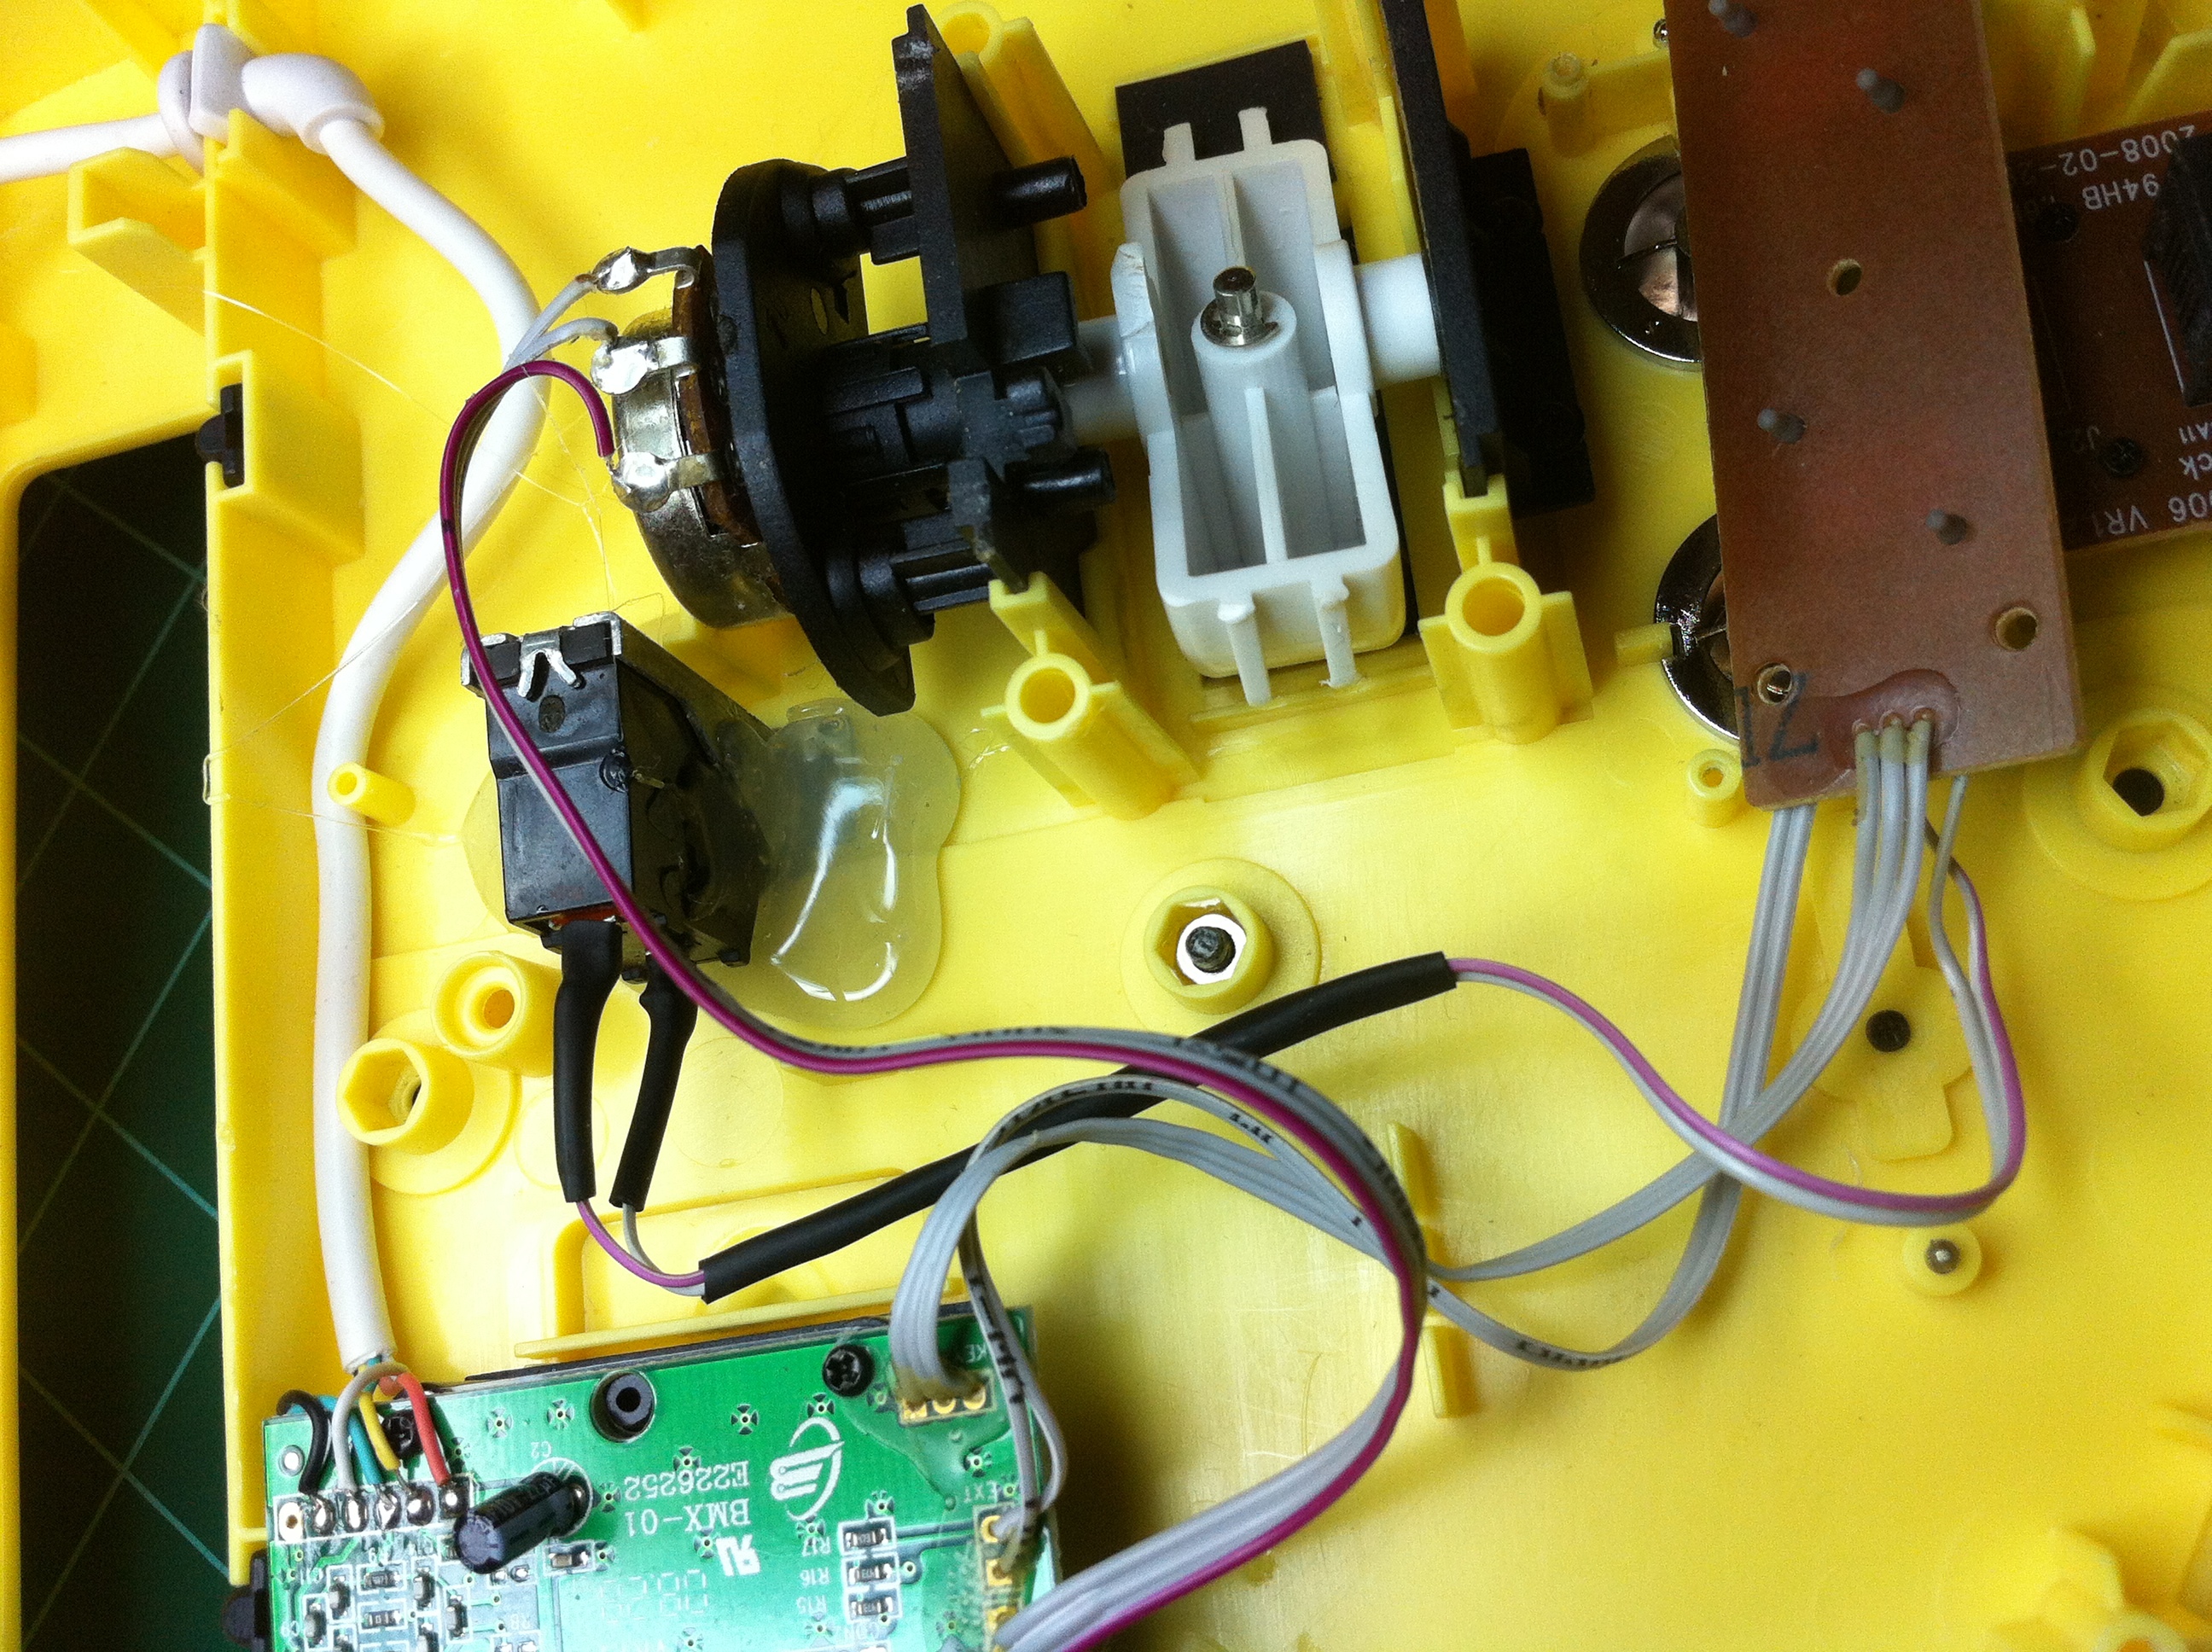
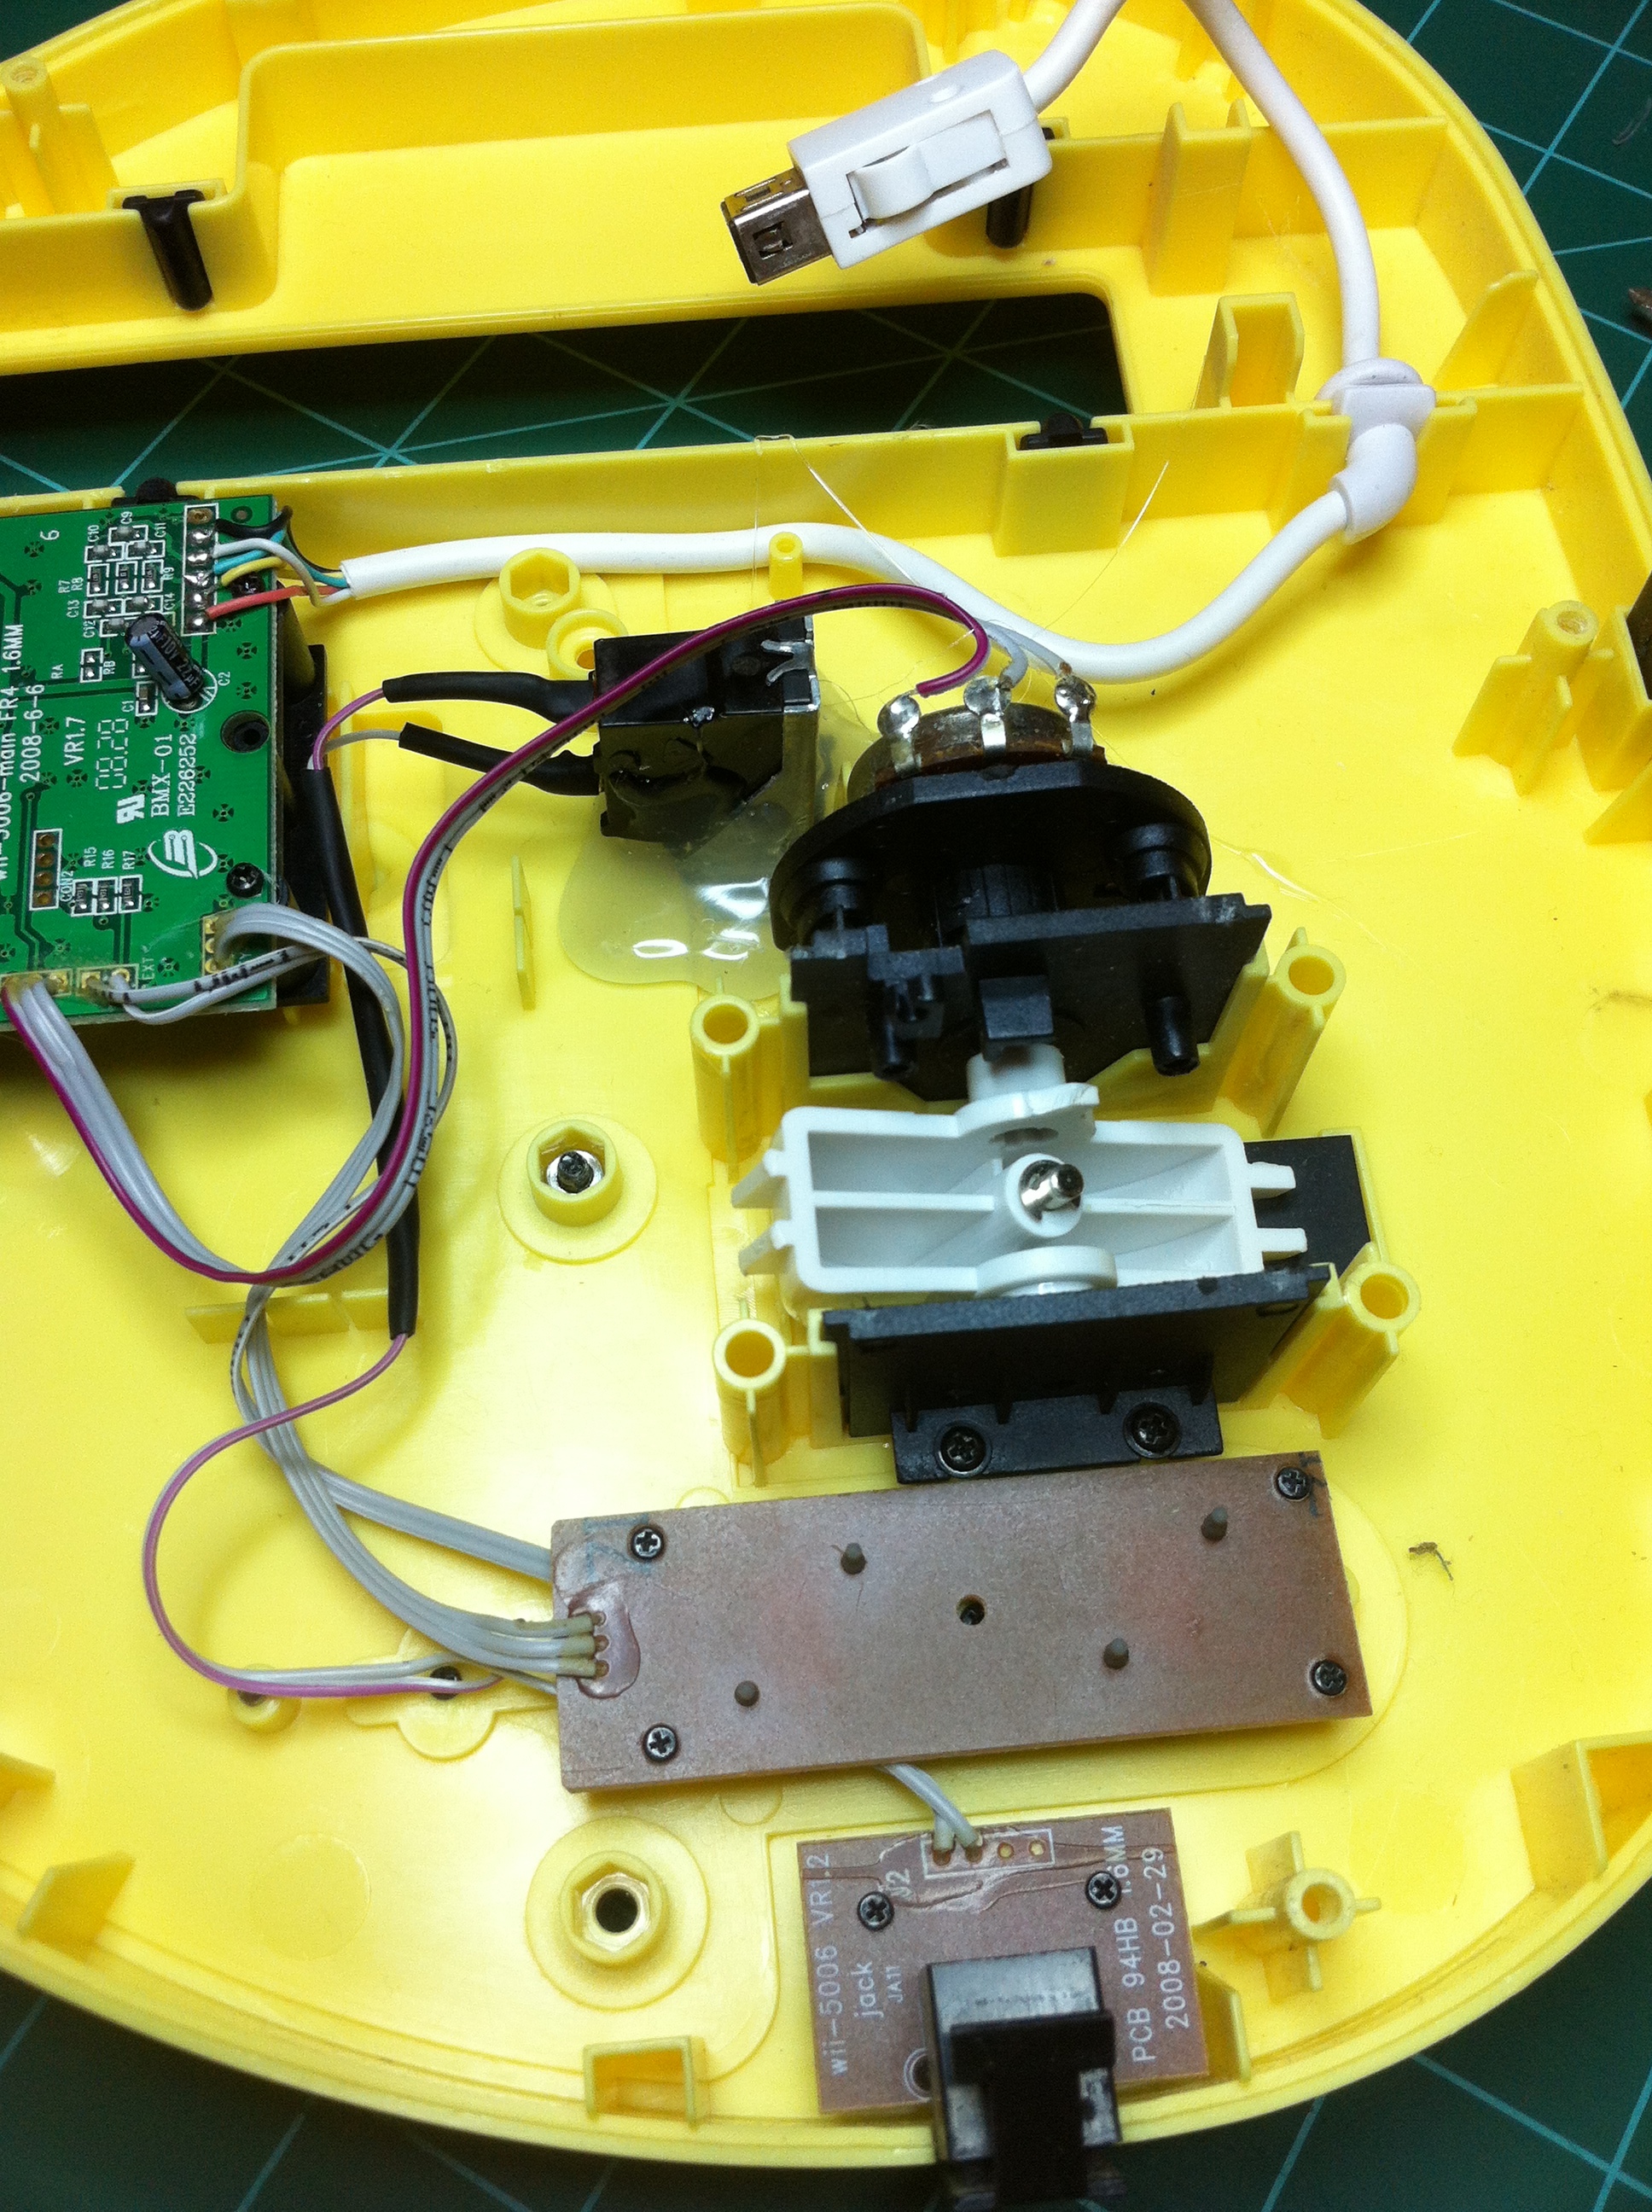
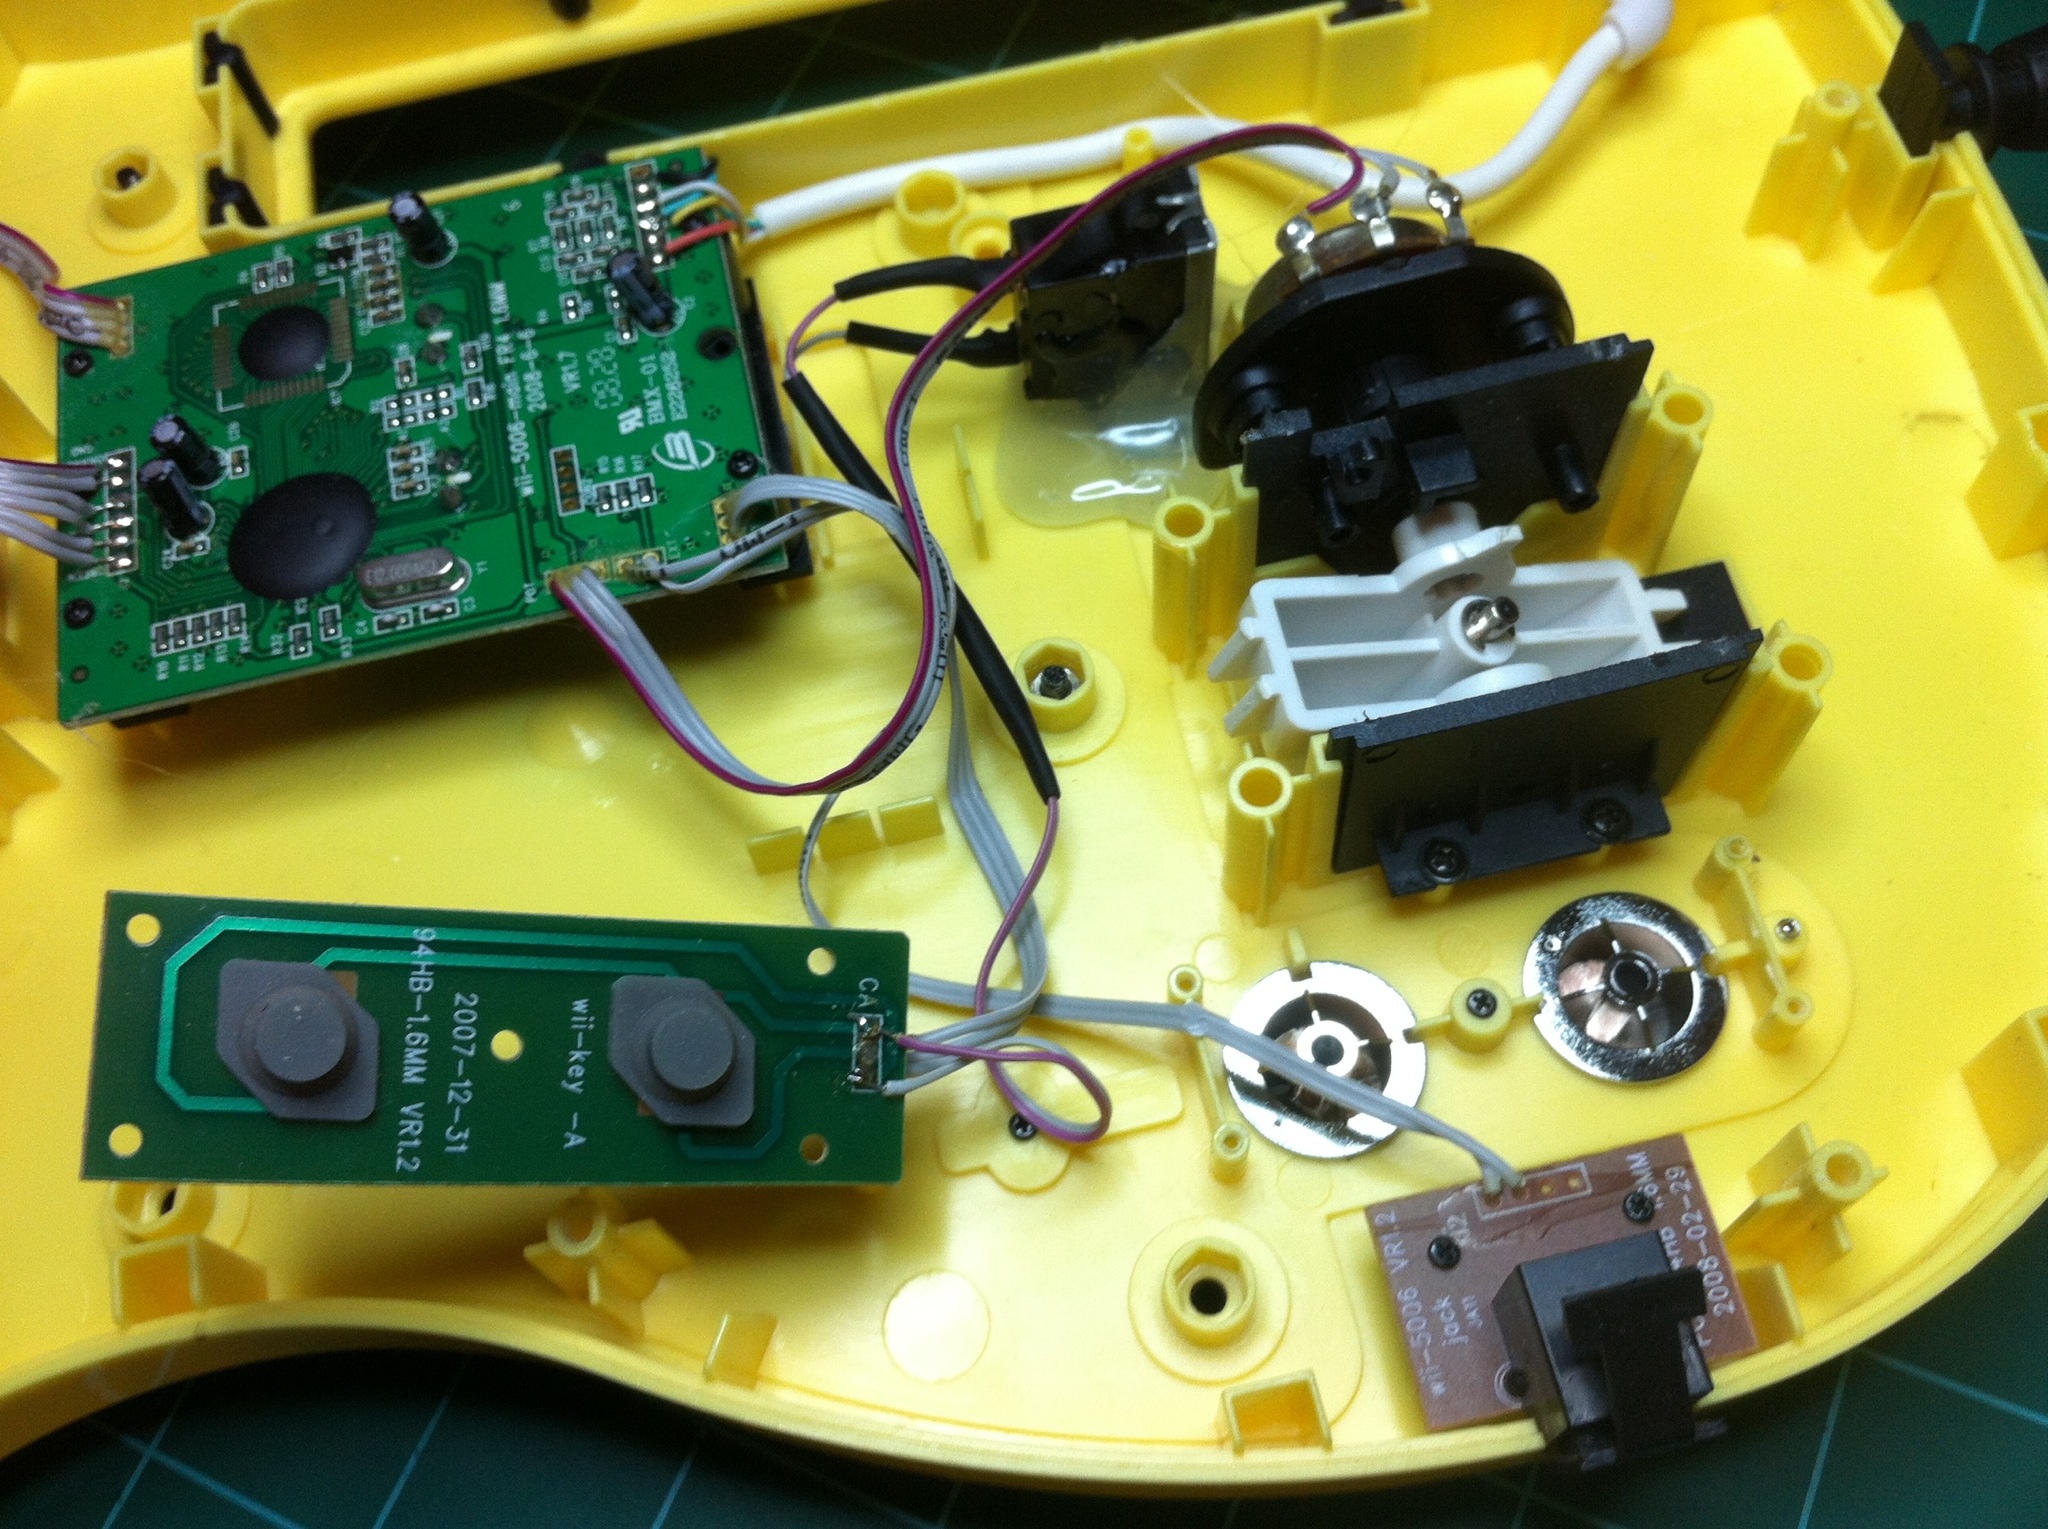
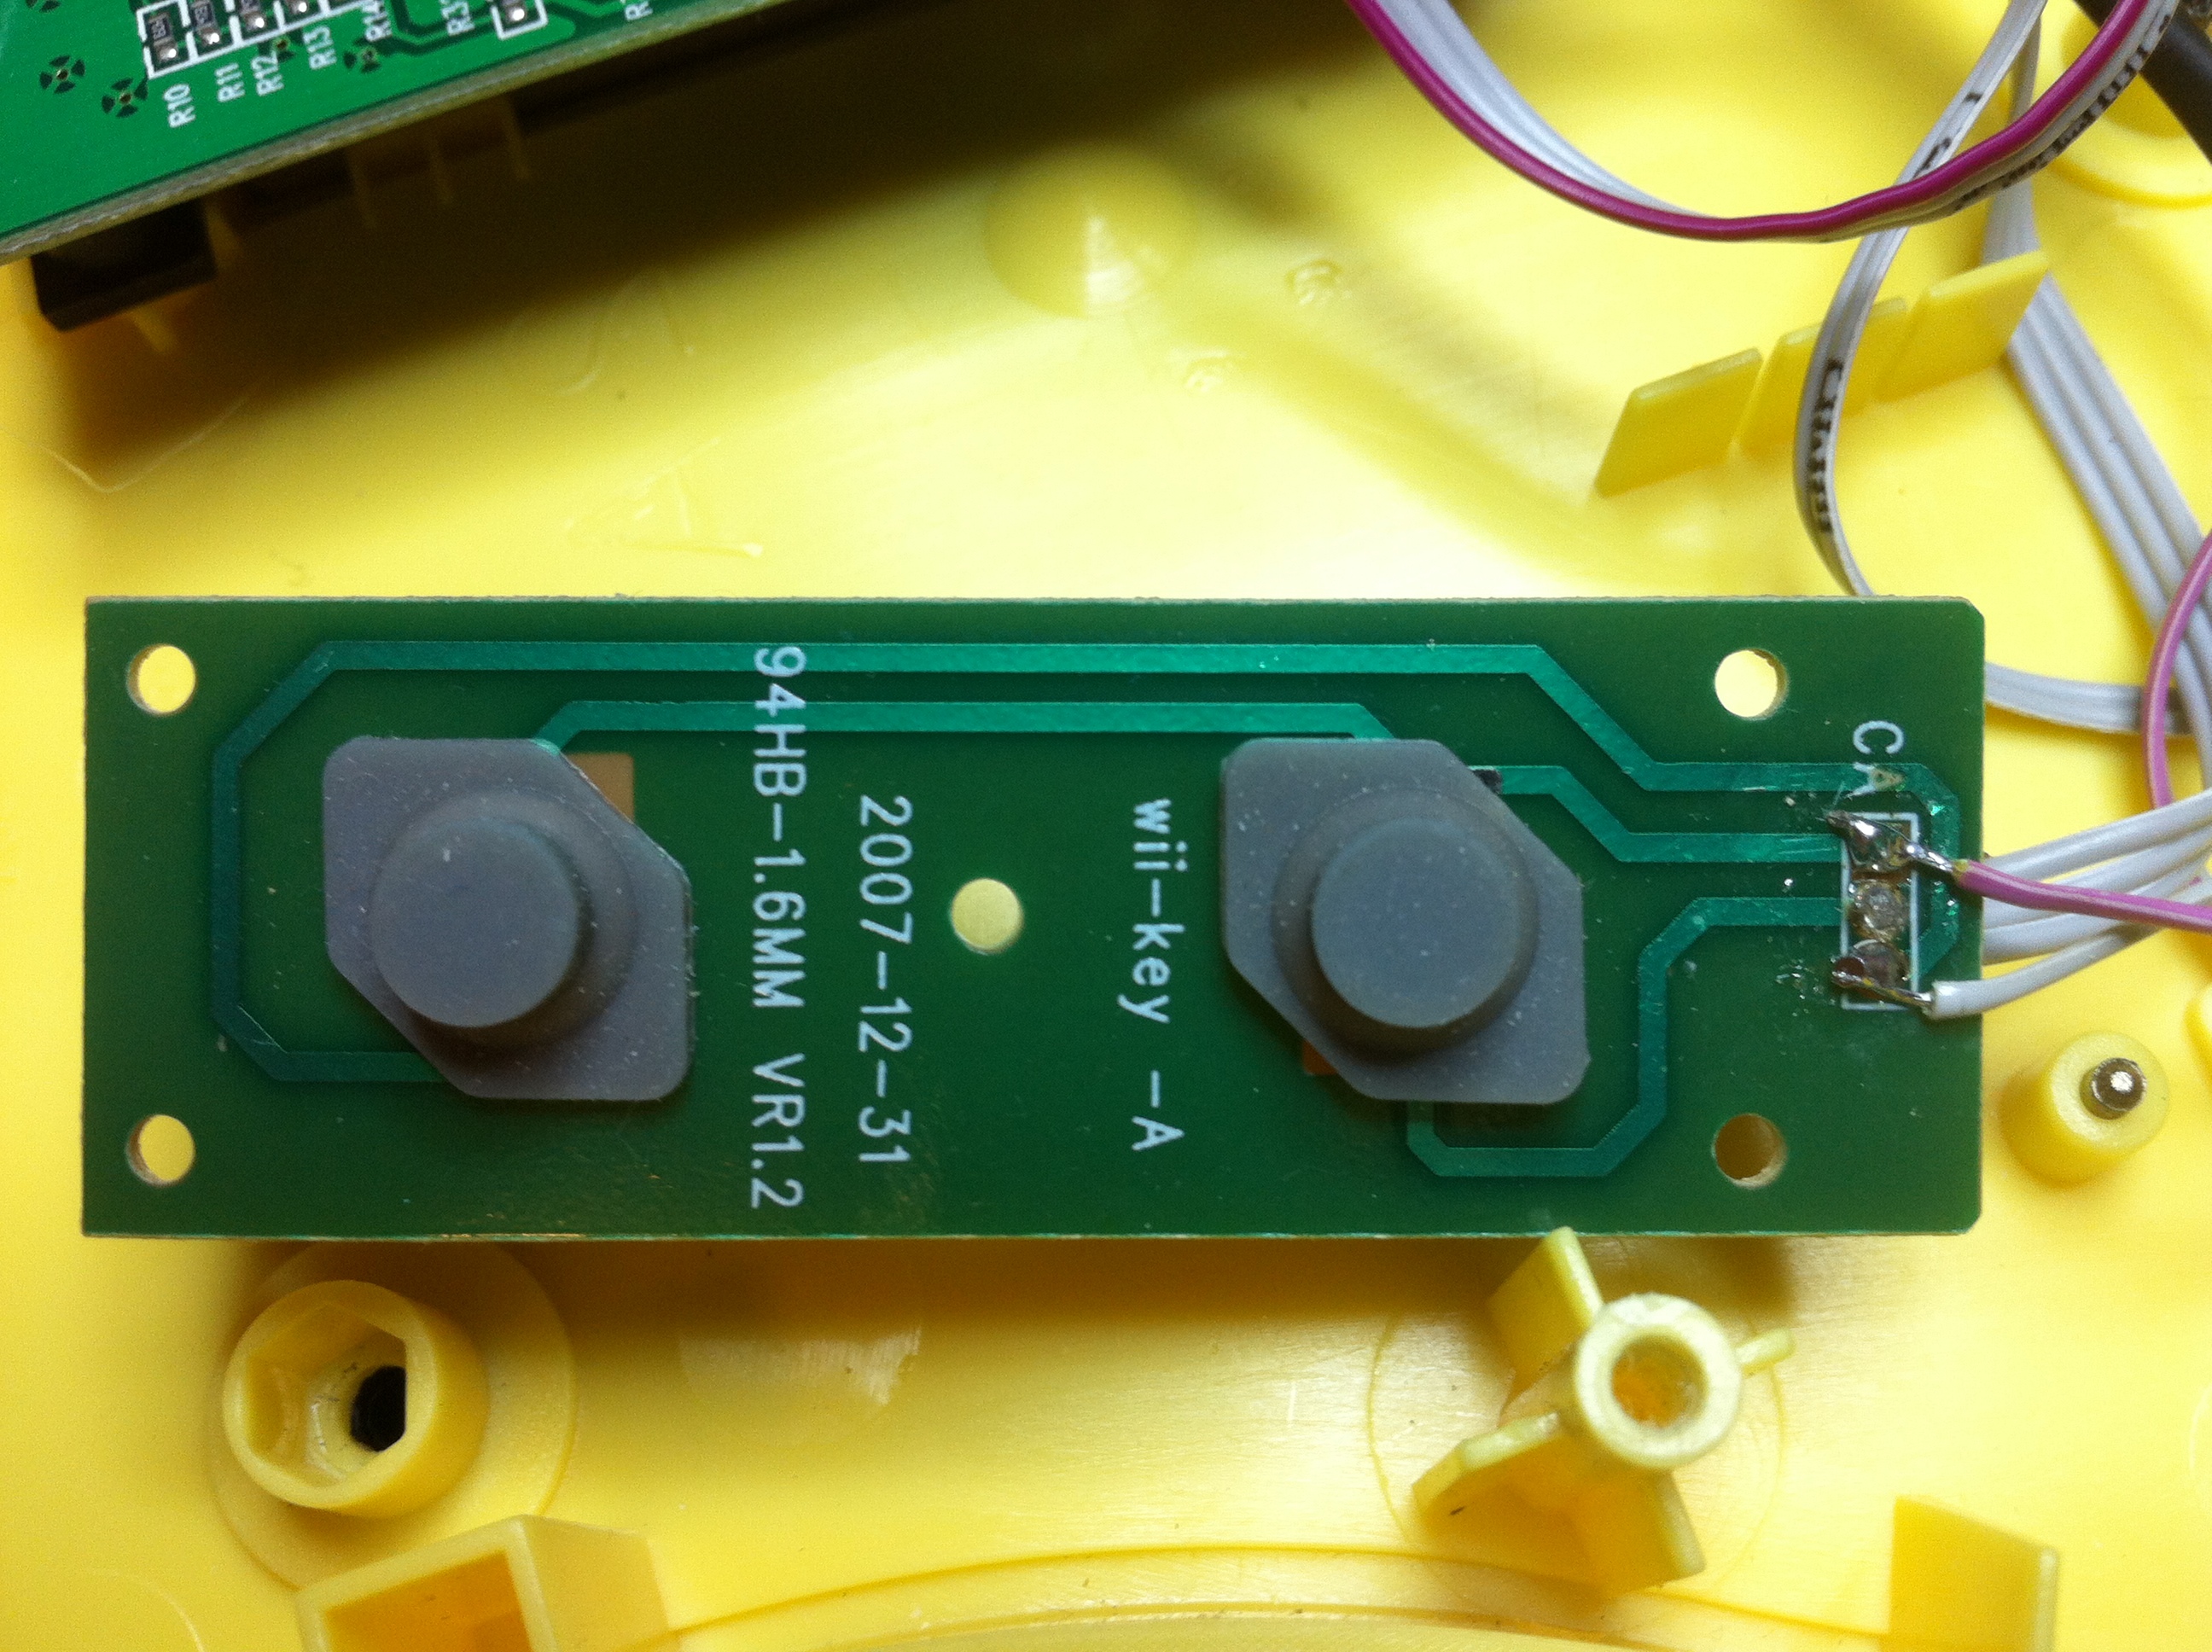
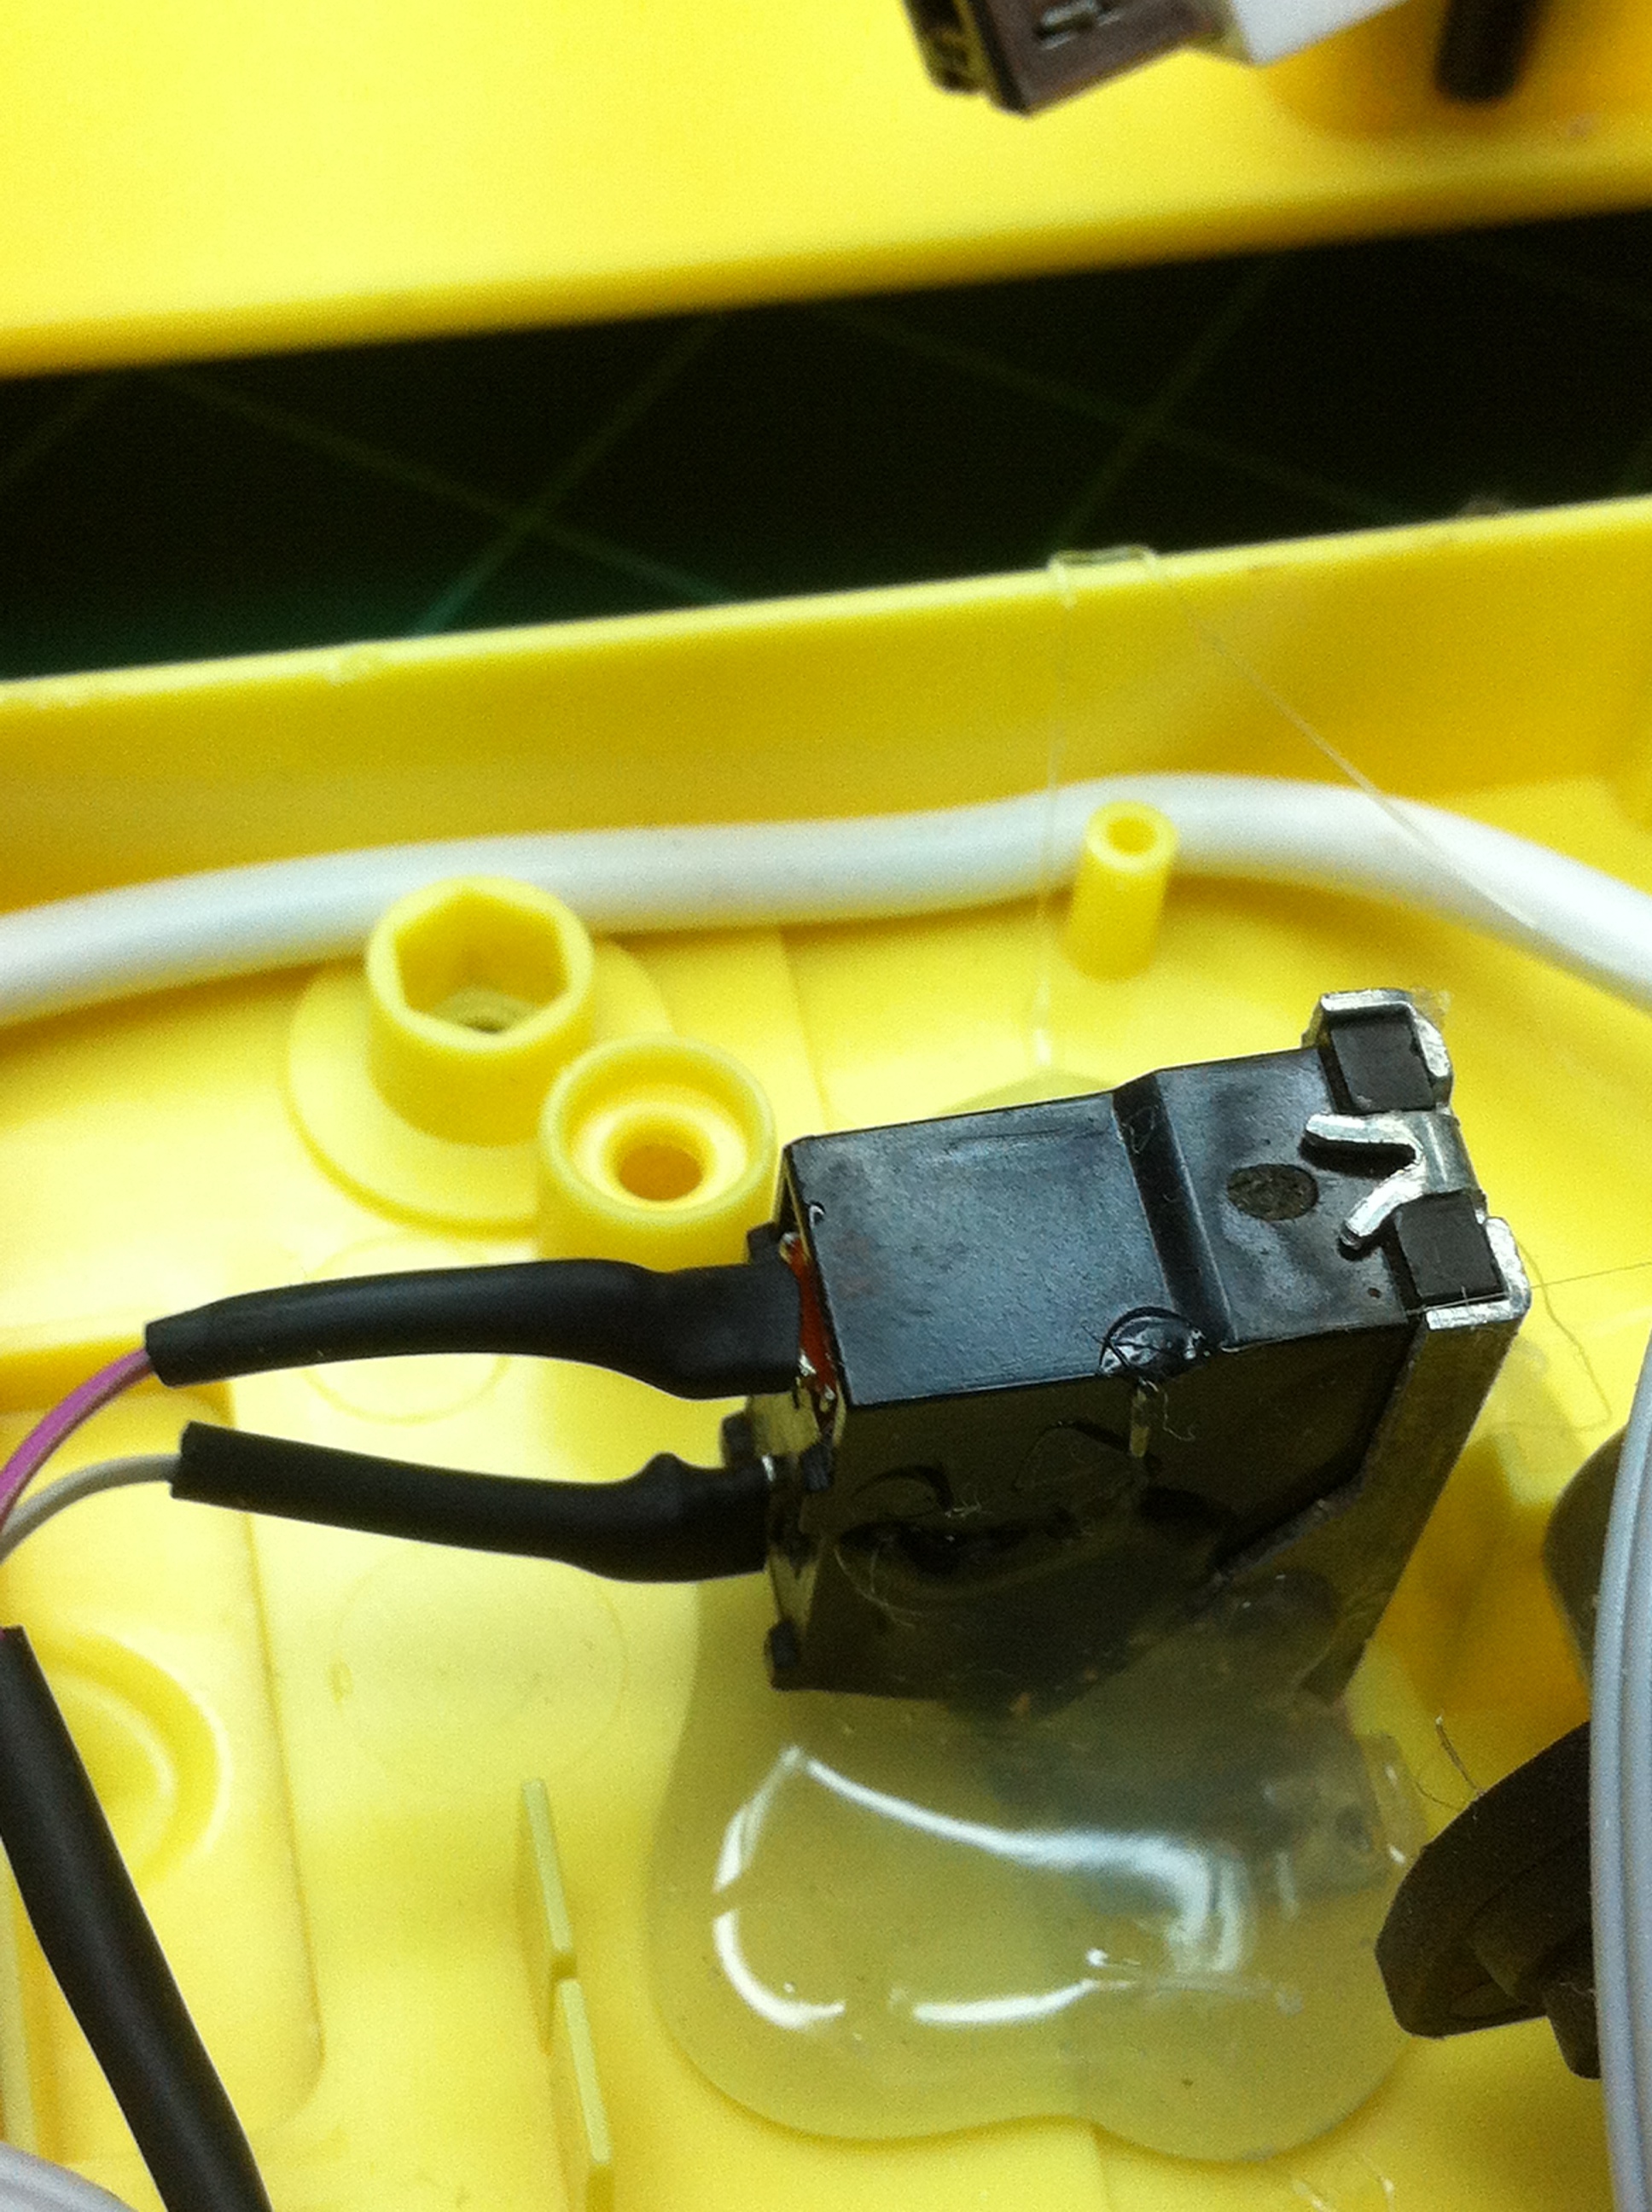
The first thing I did was hold the guitar like I was playing and tried to find the best position for me to put in a button. Then I marked that place with a sharpie — Tip: I placed a piece of painters tape in the general area of where I was going to place the button, that way when the project was completed I could take off the tape and there would be no sharpie on the guitar itself. — After I had the button location marked, I opened up the guitar and started looking how to mount the button. The switch I decided on using was a switch I had saved from an old, junker computer. It seemed to be the perfect button because it had a spring on it that pushed the button back to the same position every time, it was a momentary switch, and because it had a very long plastic ‘neck’ on it for mounting a ‘bar’. As I mentioned in the last sentence, I planned on adding a wooden bar to the top of the switch to make it easier to hit while playing the guitar. After I opened the guitar and made sure that the position I wanted to place my switch at was okay, (I was looking to see if there was a circuit board or other device in the guitar that would prevent me from placing my switch where I wanted) I drilled a hole (from the outside of the guitar) where the button was going to stick out at.
At this point it was time for me to find out the electrical side of the operation. Using the continuity function on my multi-meter, I found out which two traces made a complete circuit when the ‘minus’ button on the guitar was pressed. I then used some ribbon cable I robbed from the same junker computer I got my switch from and soldered it to one pole of my switch and I soldered the end of the wire to the end of one of the traces on the ‘minus’ button’s PCB. Then I did the same with another wire, but I soldered that one to the other pole of my switch and to the other trace on the PCB. At this point I tested the setup with my multimeter to make sure my newly added switch closed the circuit. I then started up the guitar hero game and tested to make sure my switch activated starpower. I did these tests before mounting the switch and closing up the guitar because it would be a real pain in the neck to have to do all of this again.
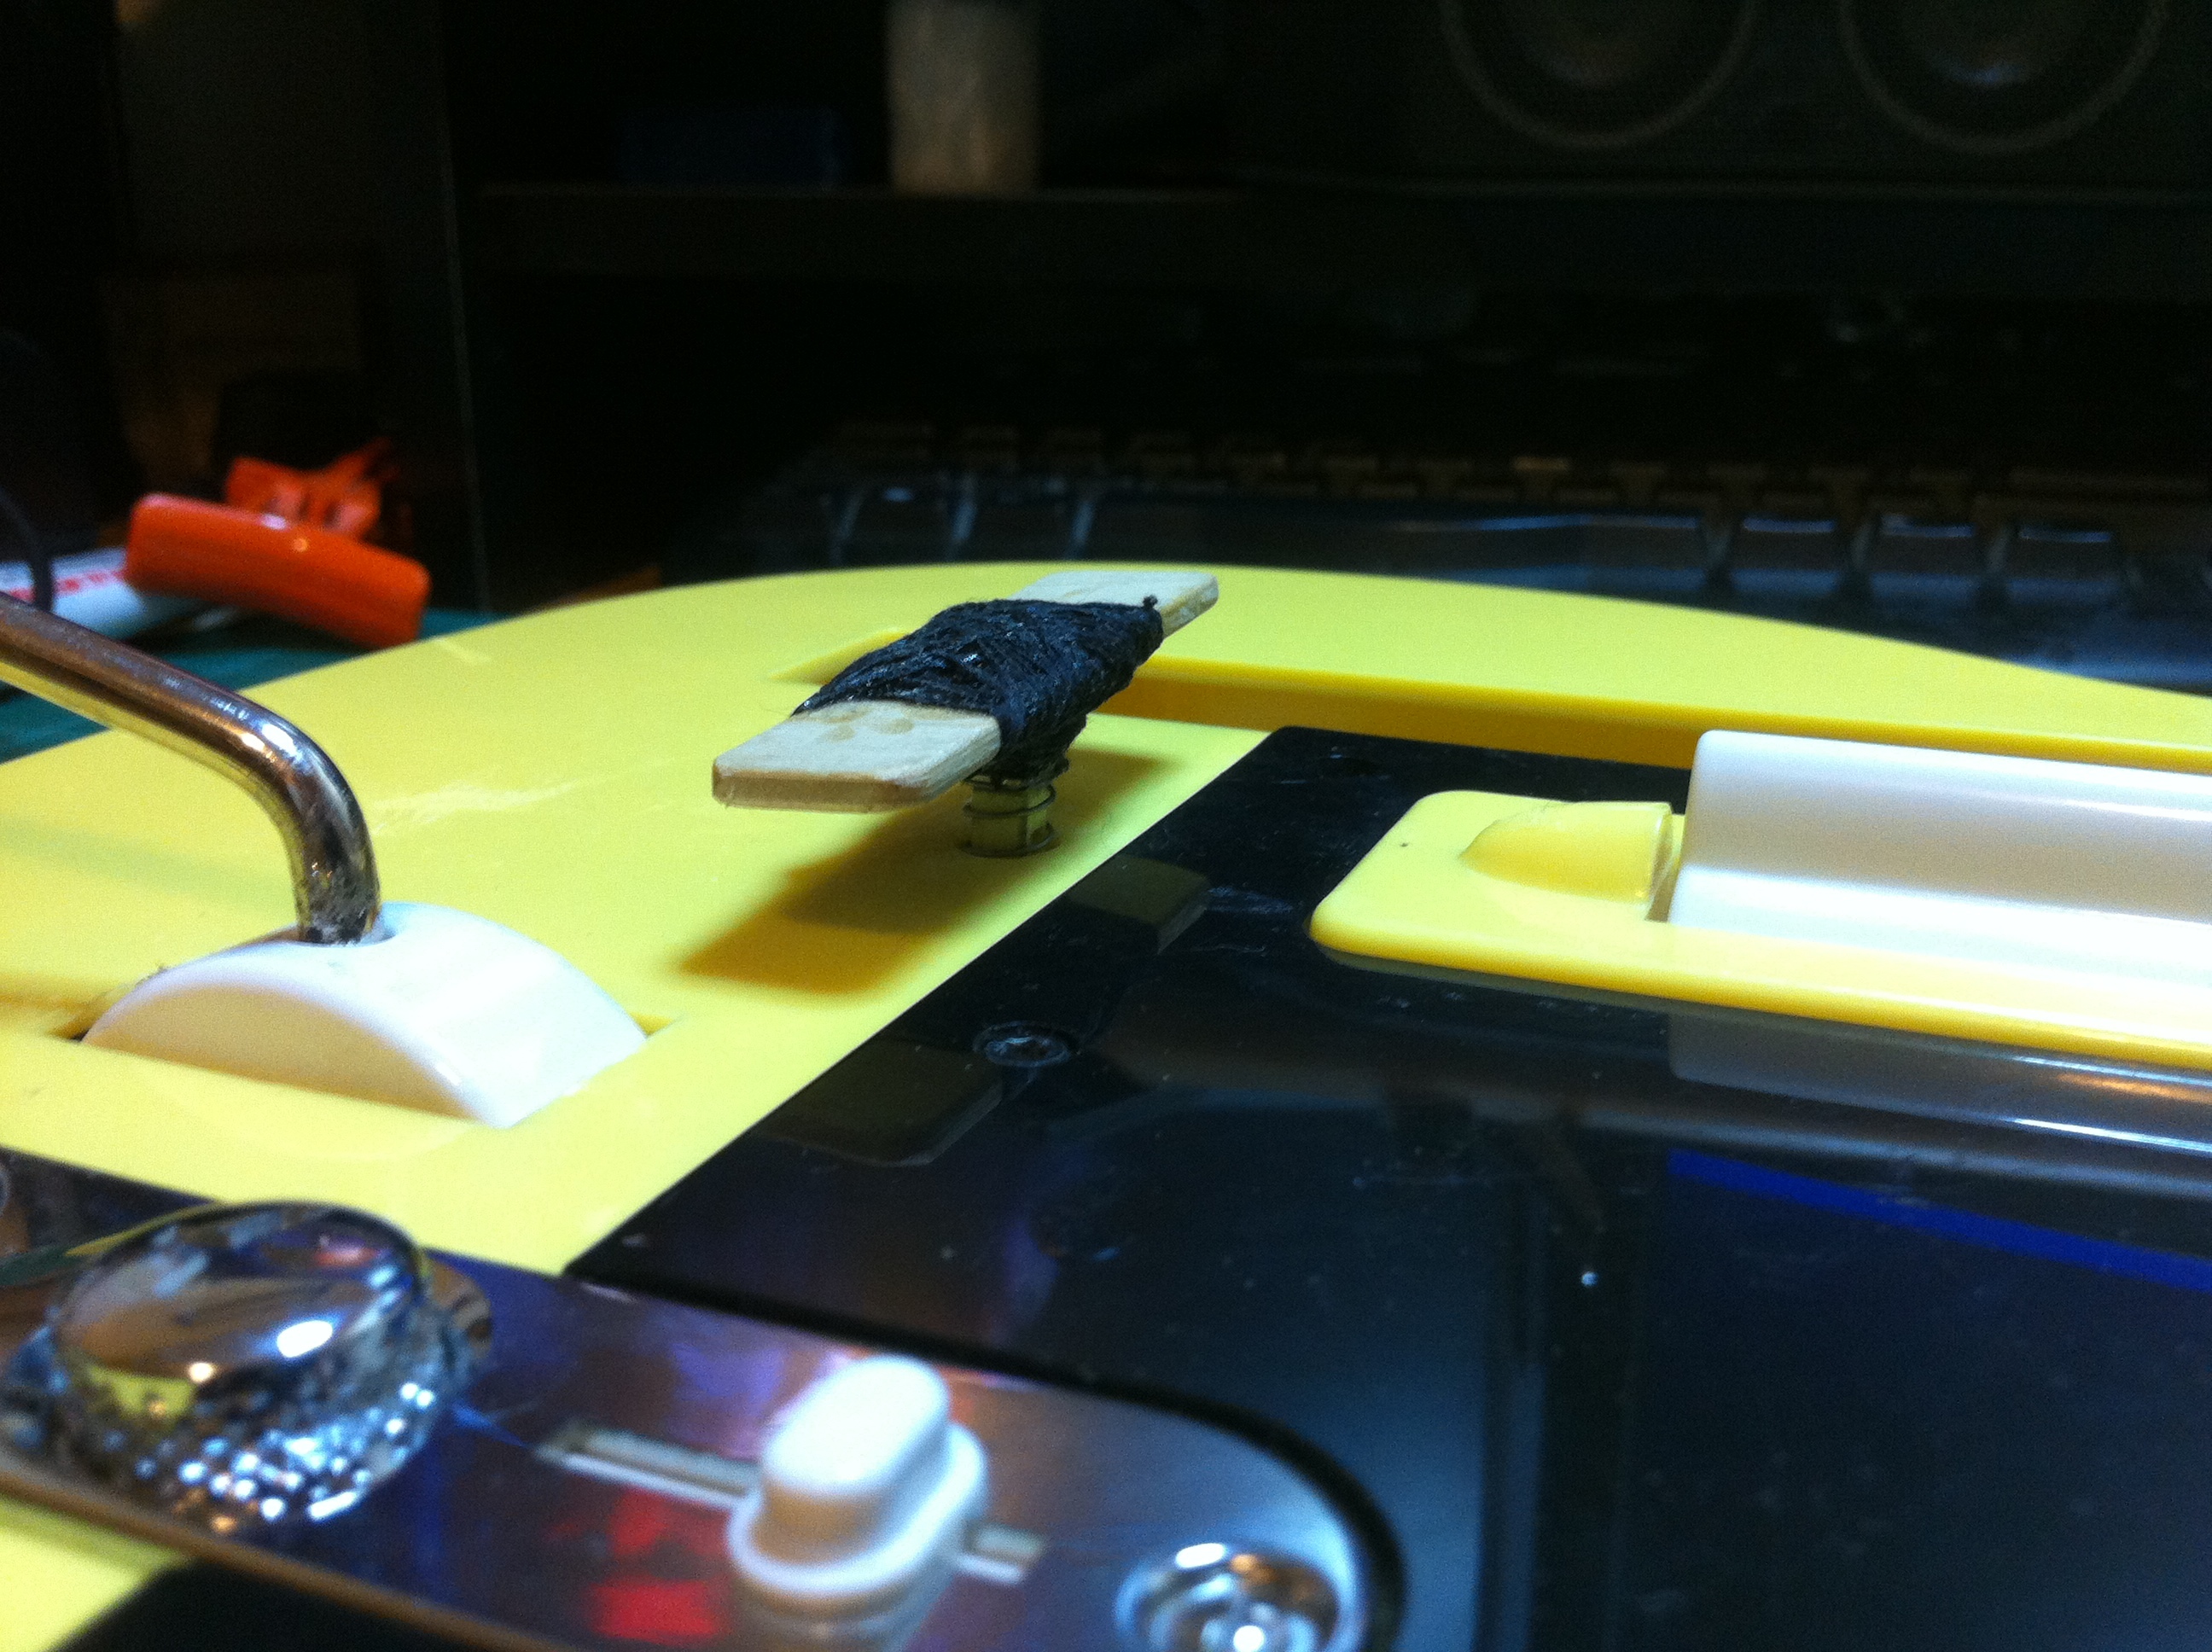
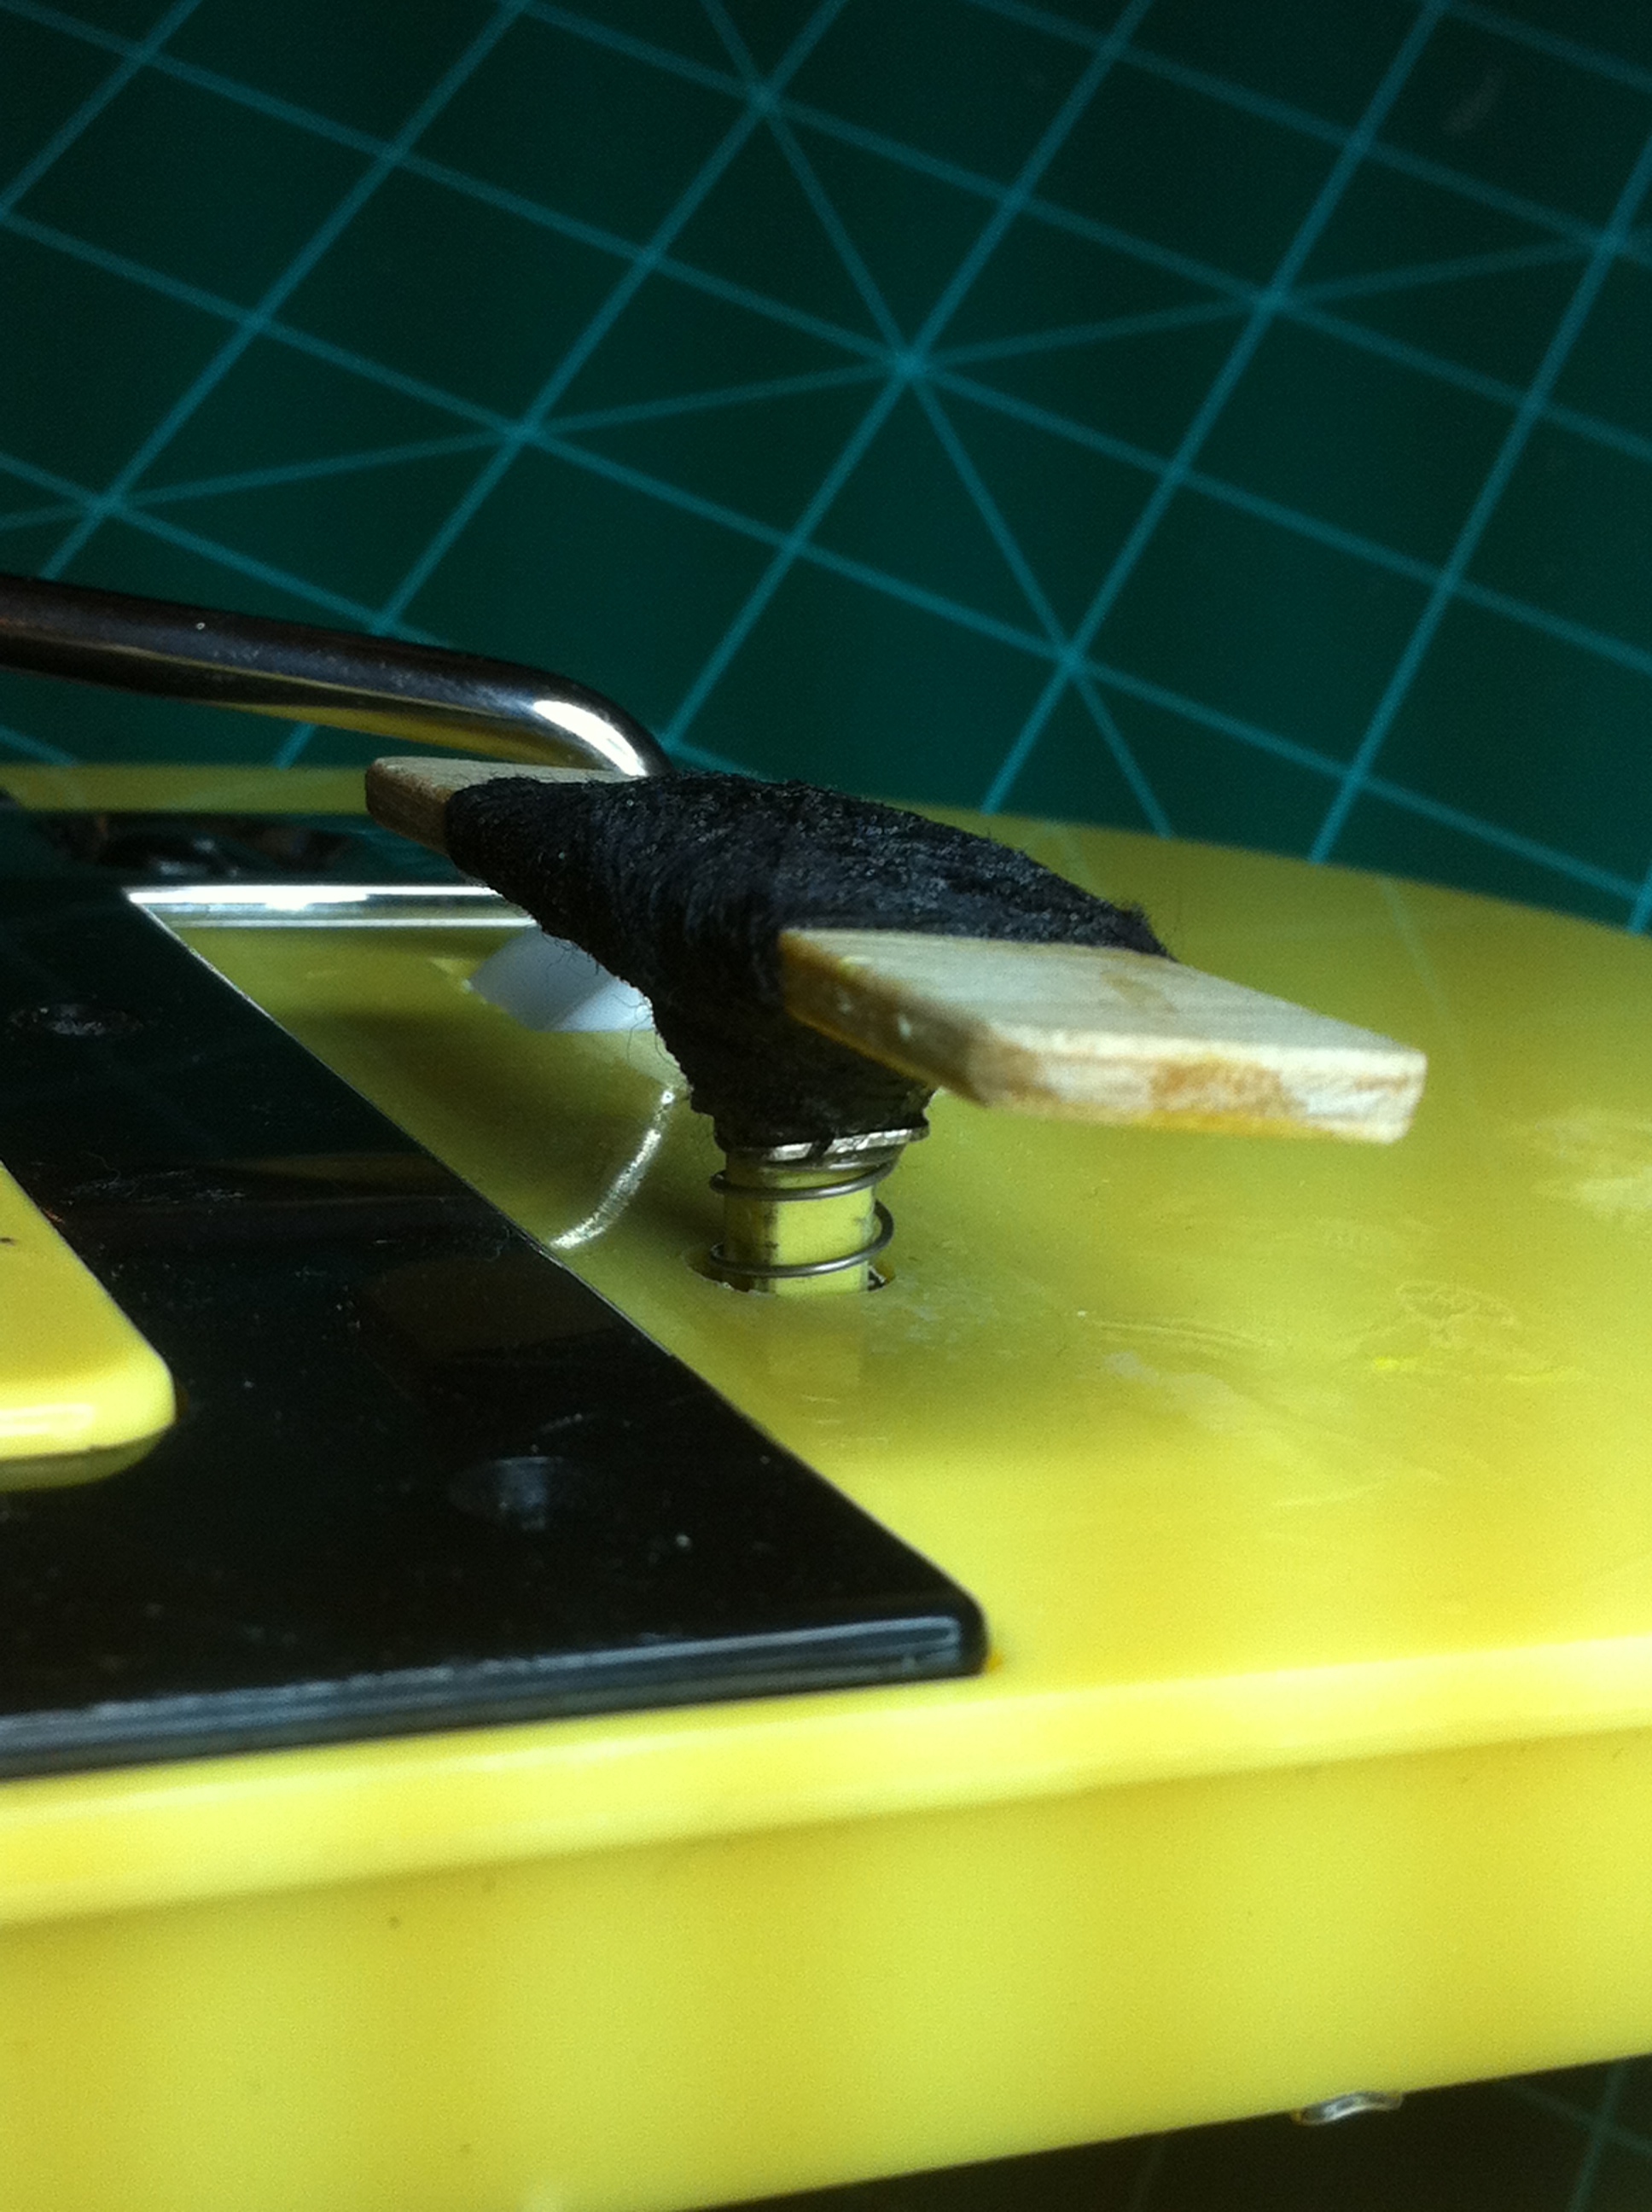
Once everything was tested and working properly, I then could move onto the mechanical side of this project – mounting the switch. To mount the switch I used my favorite adhesive, hot glue! I stuck the switch through the hole I drilled previously and once I had it positioned to my liking, I really gobbed on the hot glue. Then it was time to add a bar to the top of the switch to make it way easier to hit while playing. I cut a piece of 1/8″ plywood ~ .75″ x 2.5″ and used thread and superglue (a lot of it) to firmly mount the plywood to the little stob on the switch.
I closed up the guitar and did a final test and, believe it or not, it worked! I could play a song and just bump the star power bar with my wrist and star power was activated. It doesn’t look too pretty, but it can make the difference from winning or losing on a Guitar Hero song!