As I was sitting bored at my desk surfing the web on RC boats, in particular homemade RC boats, I stumbled across a how-to on making your own brass propellers. When I have fooled around with making RC boats in the past, I’ve always had trouble when it came to making props. I once made a prop out of clay and have also used a prop that goes on the tail-rotor of a little Air Hogz heli, as you can imagine, neither one of these worked very well. When I saw this how-to, and saw how simple it was, I started scrounging up parts . . .
I found a small brass tube about 3/16″ diameter and it was about 3-4″ long. I knew that I didn’t have any brass sheet like the tutorial called for, but I did have a Dollar Tree cookie sheet I bought a few days before for the metal. Although I didn’t have the exact parts that the how-to called for, I knew I could build a prop with what I had laying around.
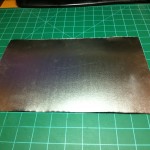
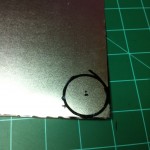
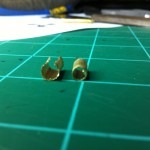
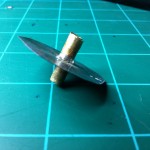
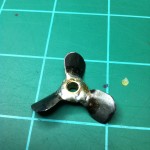
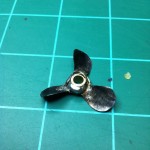
The first thing I did was cut a 3/4″ piece off of the brass tube, then I cut two 3/8″ long pieces. The 3/4″ piece will be the part that the prop will be built on, and eventually be the hub of the prop. The two 3/8″ pieces will be cut lengthwise and spread open a bit to slide over the 3/4″ piece. At this point I got some tin snips and cut off the walls of my cookie tray. I wanted a flat pice of sheet metal to work with. After I had the sides removed from the tray, I printed off the picture of propellers that the writer of the tutorial attached. I cut out the circle that encompassed the prop configuration that was colored in red. I then traced around the circle I just cut out onto the metal and then loosely cut that metal circle out. I drilled a hole in the center of the metal disk the same size as the diameter of my brass tube. I then slid the metal disk onto the 3/4″ long piece of brass tubing. After flaring out the two pieces of tubing that were 3/8″long, I slid them onto the 3/4″ piece of tube with the metal disk sandwiched in between. I then soldered all of this together. After carefully cutting out the center of the prop picture I had I used a glue-stick to stick the prop picture to the metal disk. I then cut out the propeller disk using tin snips as best I could. To clean up the edges of the prop I used a sandpaper disk and my Dremel. At this point the shaping of the prop was done, I now just needed to add some curve to the blades themselves and add some pitch to the prop.
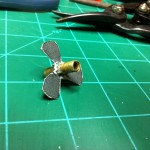
I just eyeballed the curve of each blade. When the looked about right, I moved on. Same thing with the pitch, I just did what felt right and ran with it. I have never fooled with real RC boats before or anything, but I just made my best guess on the pitch of the prop.
While setting the pitch of the prop, my solder joint broke so I went and really gobbed on the solder. I don’t think it should break anytime soon.
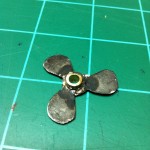
I was very surprised how easy it was to make my own prop, but the real question is: does it work? I think it will work fine for me. When I spun it with a small brushed DC motor, it actually produced wind. I will keep ya’ll informed on how well it does. My only problem is, now I need to build a boat . . . .
Prop Pictures . . .