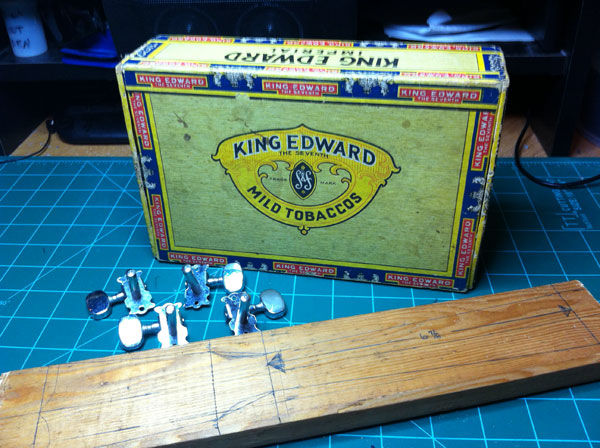
A couple of months ago I picked up a few cigar boxes at a yard sale for three bucks. I got them because they seemed great for projects and mainly to make a cigar box guitar at some point. So I guess it was about a week and a half ago I was sitting at my work desk bored trying to find something to do when I remembered my cigar boxes. I got ’em out and started making plans to build a cigar box guitar. . .
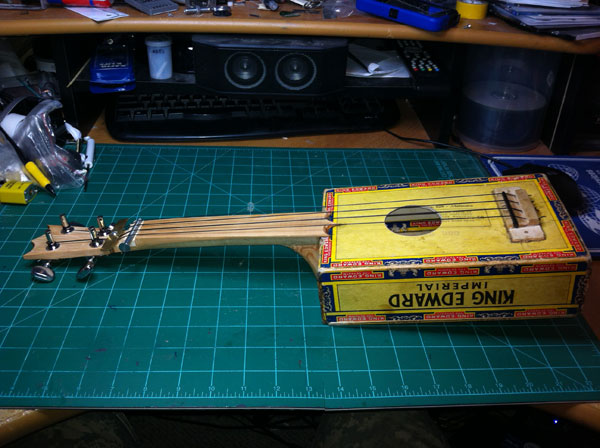
So after doing some quick researching, I realized that my boxes were too small for a normal sized cigar box guitar so I decided to make a cigar box ukulele. After I got the ukulele measurements I needed (vibrating string length, fingerboard length, fingerboard width, etc.) I started working on making the neck of the ukulele.
Neck of the Ukulele
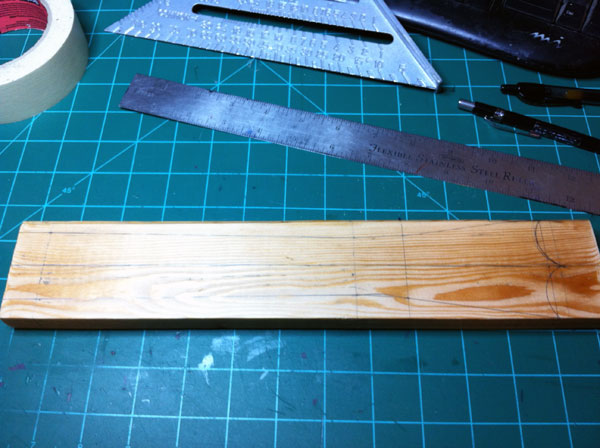
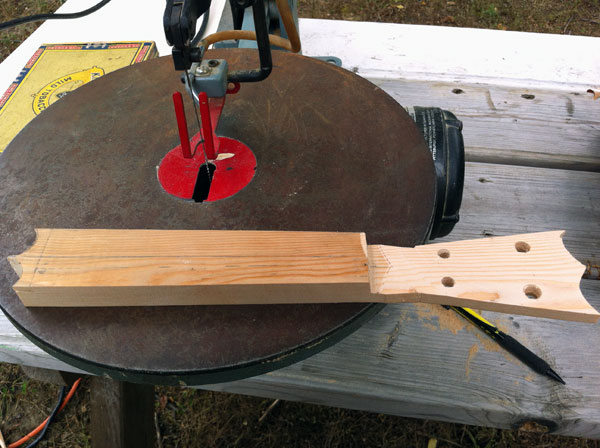
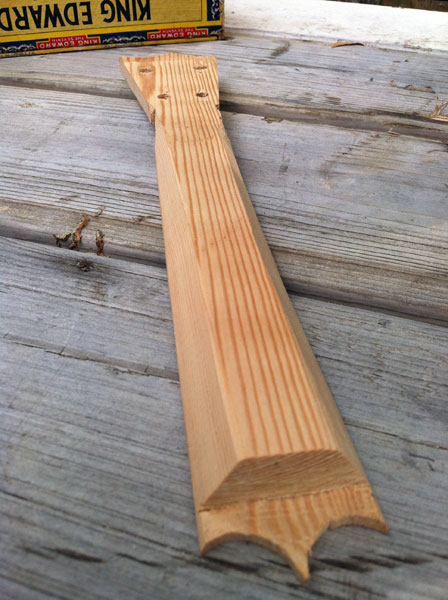
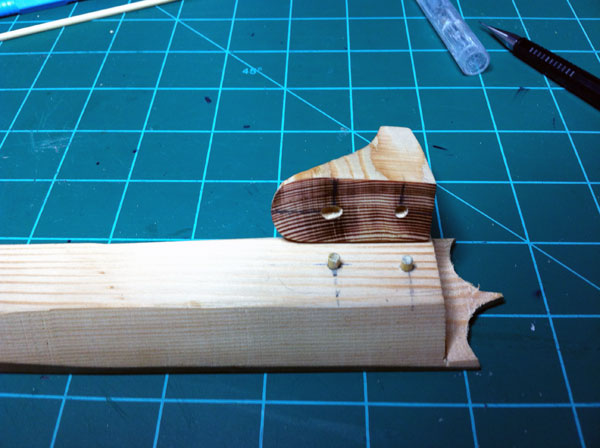
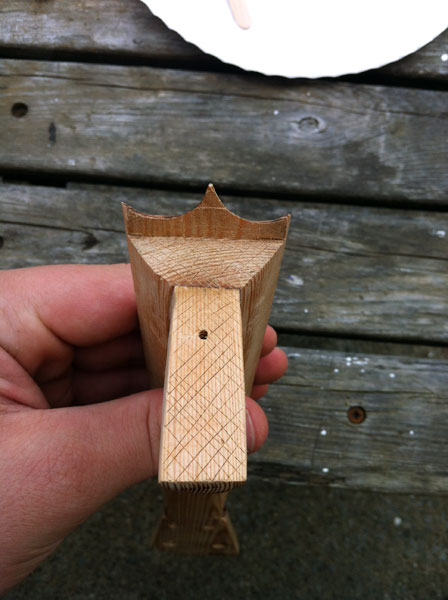
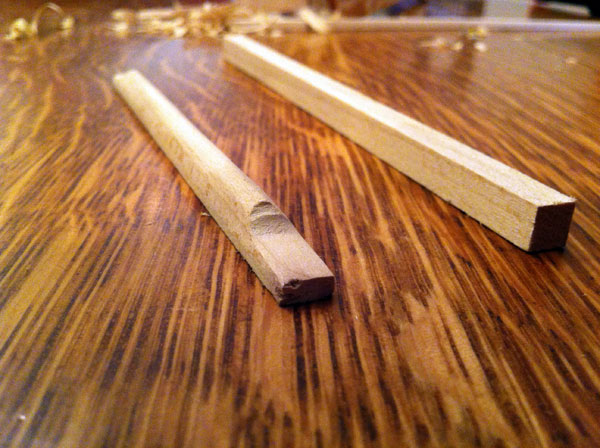
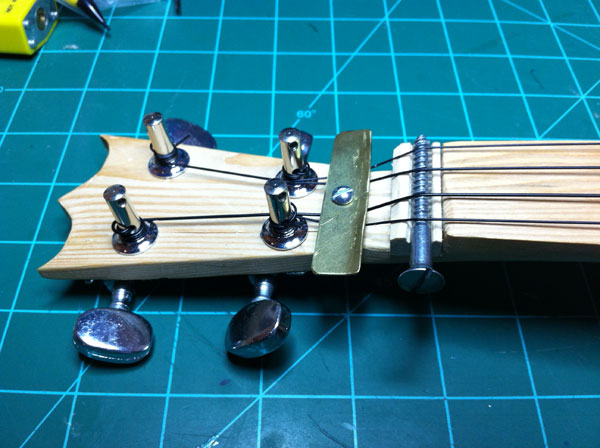
I made the neck of the ukelele from a piece of 1×3 inch pine. I find it kinda funny that I made the neck of my uke from pine and my cigar box is cardboard because it’s the exact opposite of what people say to use on the Internet. I actually read multiple places to “not use a cardboard cigar box” and to “stay away from using soft woods like pine for the neck of the instrument”. Anyway, back to the neck construction. I took my piece of pine and drew out the shape of the neck/head and cut it out with a scroll saw. I cut down the head of the instrument so it was only half of the thickness of the rest of the neck. I did this so when I install the machine tuners and strings, the tuners will be lower than the fingerboard/nut. I want them lower than the fingerboard, and more importantly the nut, so when the strings are tight they will be pulled against the nut which will in turn make the instrument sound better.
Around this time I ran to the local music store and asked the luthier if he had some used machine tuners that he’d sell for cheap. I walked out with a set of used banjo tuners for $8.50. When I got home I marked where the tuners would go and drilled the holes to mount them. After drilling the tuner holes, I began sanding. I took a belt sander and sanded an angle on the back side of the neck – the angle is probably roughly 30 degress or so. I then sanded the whole neck with a 220grit piece of sandpaper.
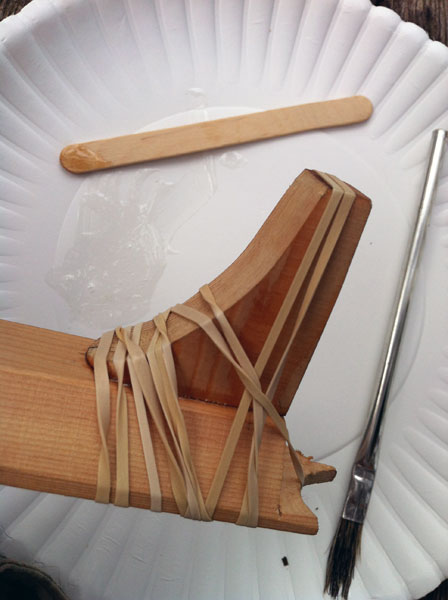
Using another piece of 1×3″ pine I cut a curved piece of wood that was around 2×1.75″ (see pictures). This piece is to glue to the bottom of the neck and ultimately to glue to the side of the cigar box for a very strong joint. To have a good bond between this piece of wood and the bottom of the neck I put in two wooden dowel pins. I glued the two pieces together with 30minute epoxy.
When the glue joint between the neck and the small curvy piece was completely cured I did some last shaping of the neck assembly with my Dremel and a sanding band. At this point I was done with what I could do with the neck.
Cigar Box Preparation
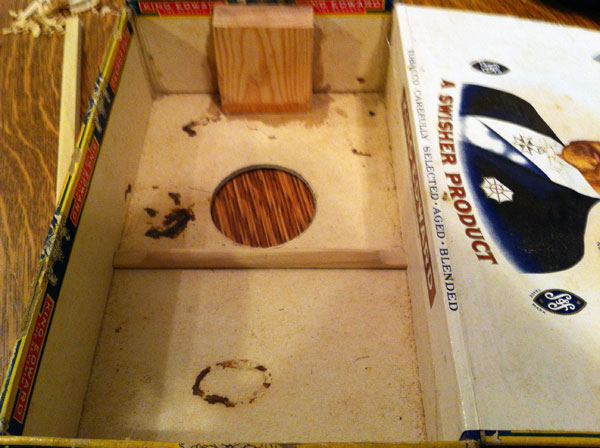
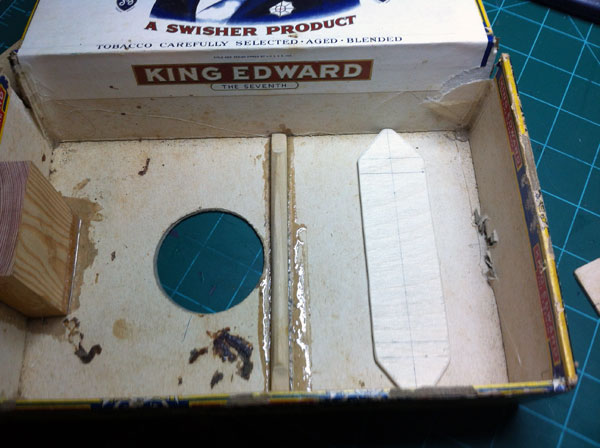
Before I could glue the neck onto the cigar box I had to do some work on it. The first thing that needed to be done was to glue a piece of wood on the inside of the box where the ukulele’s neck will be glued. This gives strength to the cardboard and a place to put a screw that will also hold the neck to the box. Another thing I did so I would have a strong joint between the neck and the box was I peeled up the outer paper on the box where the neck will attach. I did this because the cigar box is kinda old and I felt like the outer layer of paper would want to just peel off when the neck was under pressure. I then used my Xacto knife to score this area so the epoxy will have more surface area to bite to when I go to glue the neck to the box. I also scored the neck where it will mate with the box edges.
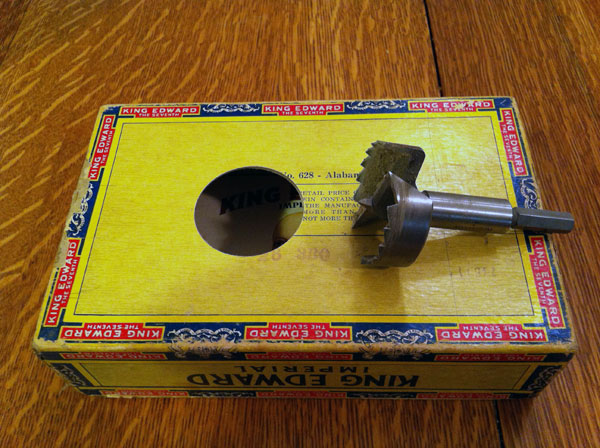
The next step in the process was to cut the sound hole. I’m very glad that I had an extra cigar box because I used one of them to find the best way to cut the sound hole. I ended up using a 2 inch forstner bit to drill out the sound hole. I found the way that gave the cleanest edge was to use a drill press and to drill about half way through the cardboard from the inside of the box and then drill the rest of the hole from the outside of the box. This gave me a very nice edge and it didn’t rip or tear the carboard. For the record I moved the drill press very slow and had it spinning at 1100rpm.
After cutting the sound hole, I took a piece of square dowel, cut it to the width of the cigar box, and then whittled it down a little bit. I then epoxied this into place just behind the soundhole on the inside of the box. This dowel is for strength and it should minimize flexing of the top of the box when the strings are pulling on it.
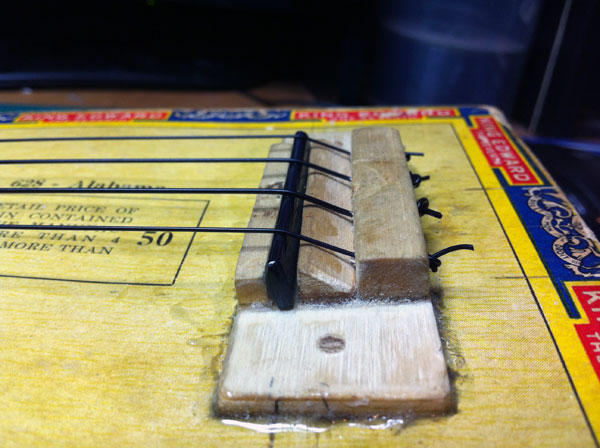
Ukulele Saddle and Bridge Assembly
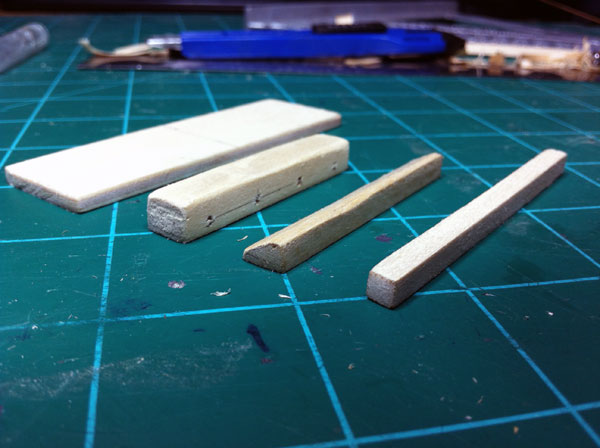
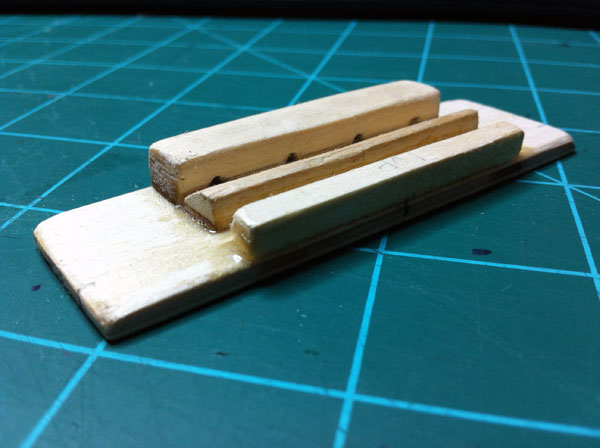
My ukulele bridge consists of a piece of 1/8″ plywood and various sizes of square wooden dowels. The base of the bridge is made of 1/8″ ply and the measurements are 1×3″. I made the tie bar of the bridge out of a piece of square dowel that I drilled 4 evenly spaced holes into. For the front of the bridge that holds the saddle in place I just used a small square dowel – I didn’t measure it but it’s probably 1/8 x 1/8″. For the other piece of wood that also holds the saddle in place I used a 3/8″ square dowel that I whittled down to 1/8″ tall and had it slope down a little. I had that piece angle because it makes it much, much easier when putting the strings on the ukulele. I then scored all of the mating surfaces and glued it all up with 30min. epoxy.
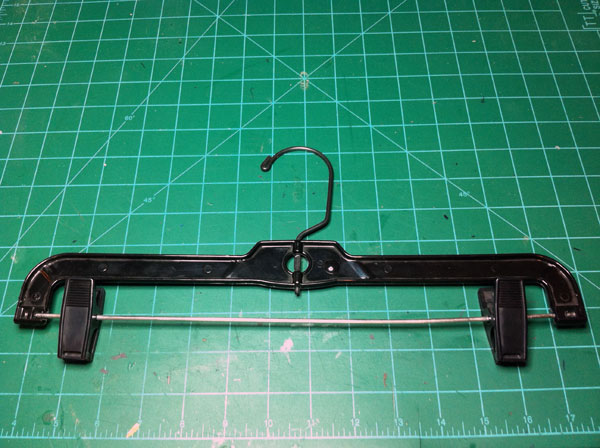
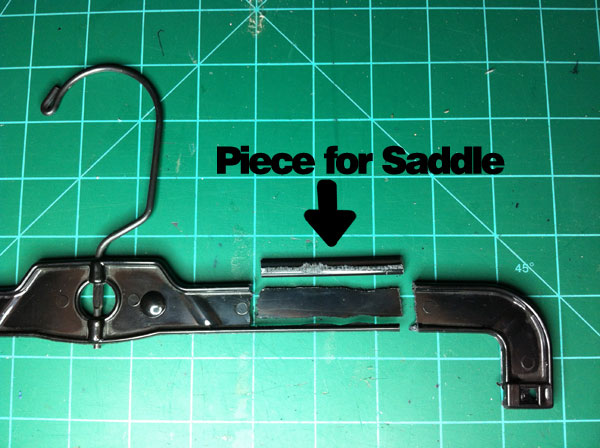
While the epoxy was curing I began working on the saddle. Saddles are normally made of a hard plastic or the like. I didn’t want to spend money to have one cut at the music store so I made mine out of a coat hanger. I took the coat hanger and cut out a piece of plastic and then filed it smooth. I also filed the bottom of the saddle flat so it would have the maximum amount of contact area with the bridge because this is how the string vibrations get channeled into the instrument’s body.
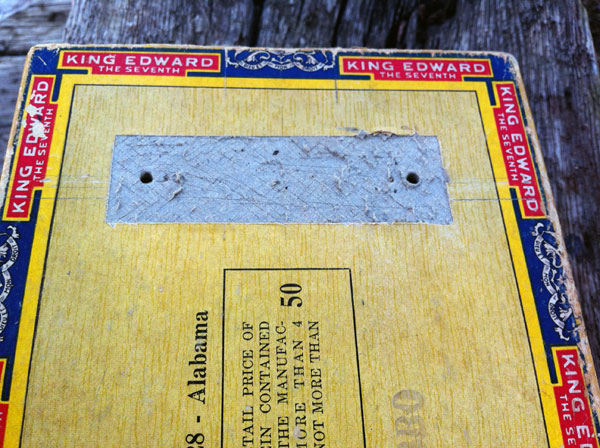
When the bridge assembly was all cured I began to mount it to the top of the cigar box. On the inside of the box, right under where the bridge will be attached, I mounted a piece of 1/8″ ply that spanned the width of the box. This was for extra strength because this is where all of the string’s pulling force will be exerted. I then placed some pins that went in between the 1/8″ ply plate on the inside of the box and the bridge. Then I epoxied the bridge on the top of the cigar box and inserted the saddle.
Neck and Cigar Box Glue-Up
At this point it was time to go ahead and glue the neck onto the cigar box. Like I said before, I scored both the cigar box and the neck’s mating surfaces for gluing. I then drilled into the block that is epoxied to the inside of the box and into the curvy part of the neck. I then epoxied up the box and the neck and ran a screw through the block in the box and into the the neck. I then left it to cure.
Finishing It Up
After the neck was done curing it was time to do all the little things to finish up the ukulele. Let me just say first though, up until this point I planned on installing frets on the instrument, but after realizing that I cut the neck at an angle, I figured it would be near impossible to get the fret wire installed perpendicular to the strings. If I had the frets just slightly off it would mess up the intonation of the instrument and I wouldn’t be able to fix it. So I just kept it fretless. So to finish up the uke I installed the machine tuners and installed the nut. For the nut of the ukulele I used a screw that was just lying on my desk. I got the idea from this awesome book I got at the library called “Handmade Music Factory”. The book has step by step plans for making homemade instruments. Some of which I may be building in the next few months. When I was messing around with my ukulele I noticed that the lid kept wanting to open so I put a screw through the lid and into the block that the neck is mounted to. Then I strung all the strings and tuned it. The tuning of a soprano ukulele, from the string closest to the floor to the string closest to your face when playing it, is A-E-C-G. After tuning ‘er up, I started plucking around on it. It actually sounds better than I expected! That doesn’t mean it sounds great at all, I mean it just sounds good for a cardboard box – haha. Below is a video I made with me playing the ukulele (and the guitar as accompaniment ) so you can hear what it sounds like!
What I would do different
If I built this ukulele again, knowing what I know now, there would be a few things I would do different. The first being the frets. I would’ve cut the fret grooves before even cutting out the shape of the neck. I also would’ve taken more care when gluing the neck to the box. I took my time to make sure that the neck was glued right in the center of the box and 90degrees with the box when looking from the top of the instrument, but I didn’t look from the edge of the box. I ended up gluing the neck at an angle when looking at the edge of the box so now when the strings are strung the distance from the fingerboard and the strings gets larger and larger as I go up the fingerboard. If I had to do it again, I would also and the head of the instrument downward so the machine tuners are even lower in comparison to the nut of the instrument. They way they are now is not low enough so when I played the ukulele the strings would buzz on the nut. To fix this I had to put a bolt threw the head with a piece of brass on it to pull the strings down upon the nut. This fixed the problem, but it doesn’t look great.
;