I have always been fascinated with catapults. Although I have built probably over a dozen, I haven’t built one in a long while. So one night over the past week I was sitting at my desk and saw my container of airsoft BBs and thought to myself that I had never made a catapult to throw airsoft BBs. At which point I began working on building a small, desktop catapult.
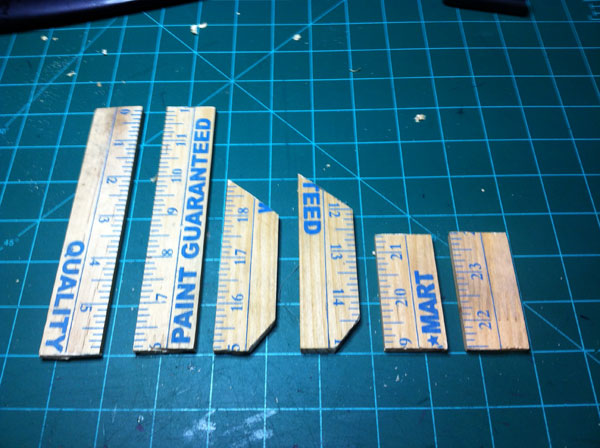
This catapult is made from a 50cent yardstick from Wal-Mart and is torsion powered. Torsion power is where energy is stored in a twisted rope and then that energy is released to move the throwing arm. Let’s begin with cutting the yardstick to make the catapult.
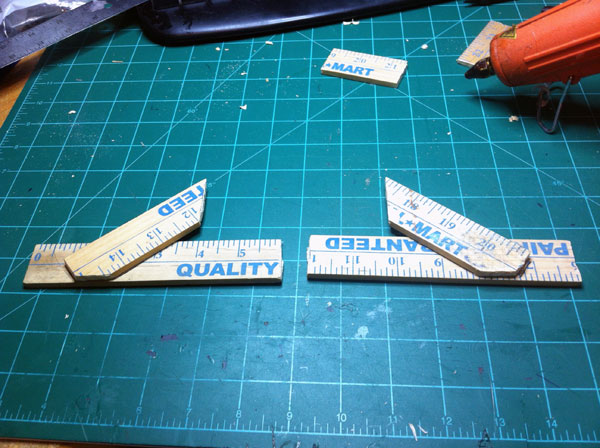
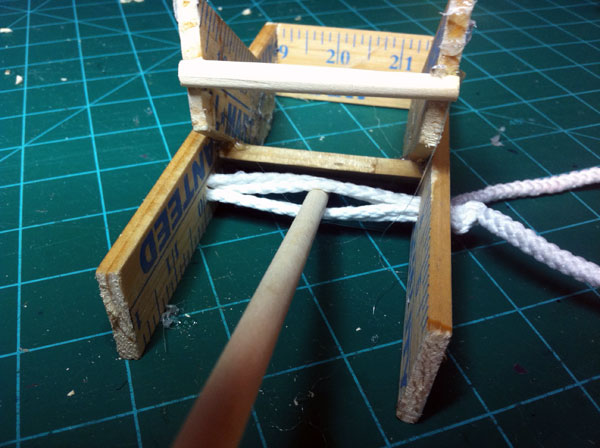
I cut two 6-inch pieces of yardsitck, two 4-inch pieces, and two 2.5-inch pieces. I began by cutting some angles in the four inch pieces and then hot gluing them onto the six inch pieces. The six inch pieces are the bottom and sides of the catapult and the four inch pieces are like a gusset that will eventually have a piece of wood glued to them that the throwing arm will hit, which will launch the projectile. After Gluing the four inch pieces to the six inch pieces, I then glued the two 2.5-inch pieces in-between the two 6-inch pieces to set the distance between the sides of the catapult. Before I started to string the rope I glued a piece of wooden dowel to the gussets of the catapult, this is the piece that the throwing arm will slam into causing the projectile to fling forward.
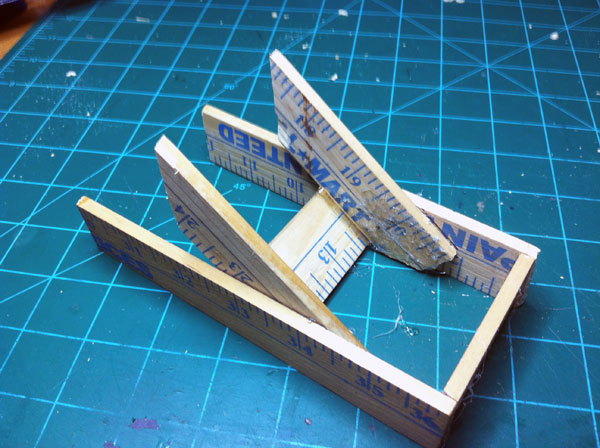
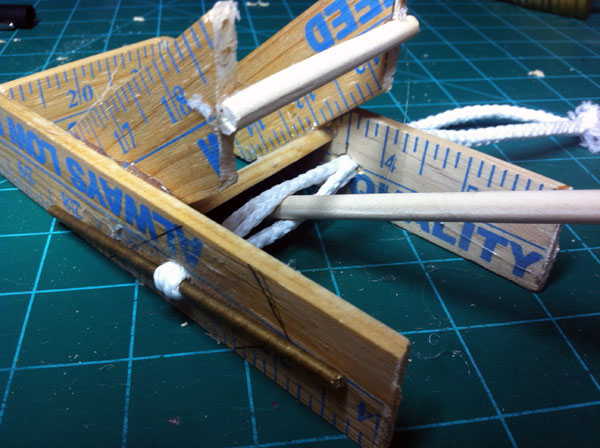
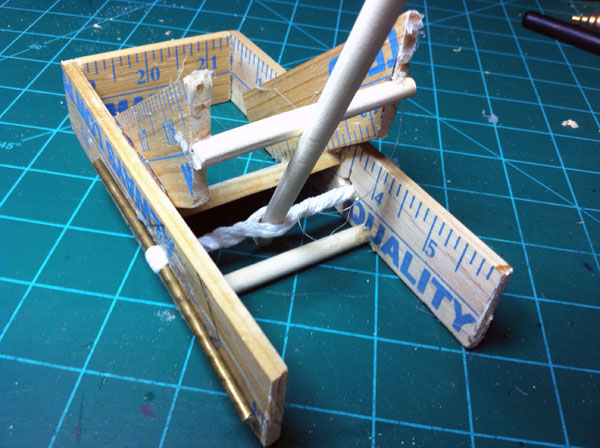
At this point I strung the rope which will give my catapult power. I did this by drilling a hole in both sides of the catapult about 1/4″ or so in diameter. I then ran one solid piece of rope through one hole (hole A), then rat it through the other hole (hole B), then looped the rope around a metal rod, then ran the rope back through hole B, then through hole A, then looped the rope around another piece of metal rod, back through hole A, through hole B, around the rod, through B, through hole A, and then tied it. Please look at the picture for this, I’m sure that is very, very confusing! At this point I had, between the sides of the catapult, four ‘pieces’ of rope. I took a piece of 1/4″ or so diameter wooden dowel and stuck it in the middle of the four pieces of rope. Then, on the outside of the catapult, I turned the metal rods that the rope is wrapped around to tighten and twist the rope. While tightening the rope I realized that I needed a strengthener in the middle of the catapult so that the tension of the rope doesn’t bust my wood, so I stuck a piece of wooden dowel in there. I continued to tighten the rope until it was tight, but did not break the catapult. Now all I needed was a ‘cup’ on the throwing arm to put the ammunition in.
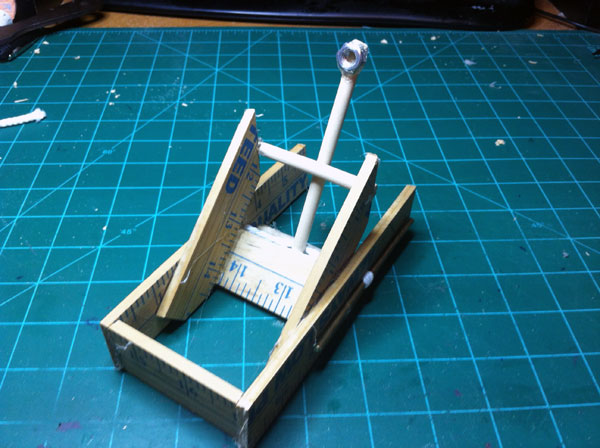
For the cup that the BBs will sit in before being launched, I used a 1/4-20 nut. I hot glued the nut to the throwing arm real well because I didn’t want the hard, metal nut come flying off instead of a light, plastic BB. After this, I did all the little finishing touches: I cut the throwing arm dowel to the appropriate size, I trimmed the rope ends, and most importantly I test fired it. The catapult worked great! I was really surprised on how much power the the twisted rope delivered. The airsoft BB went flying when I let it go. I do warn you though, if you make one of these I really recommend using safety goggles when firing the catapult. I didn’t at first, but when I shot the catapult at a target about 20 feet away and the BB bounced all the way back to me, I quickly went and found me a pair of goggles.
Pictures . . . .